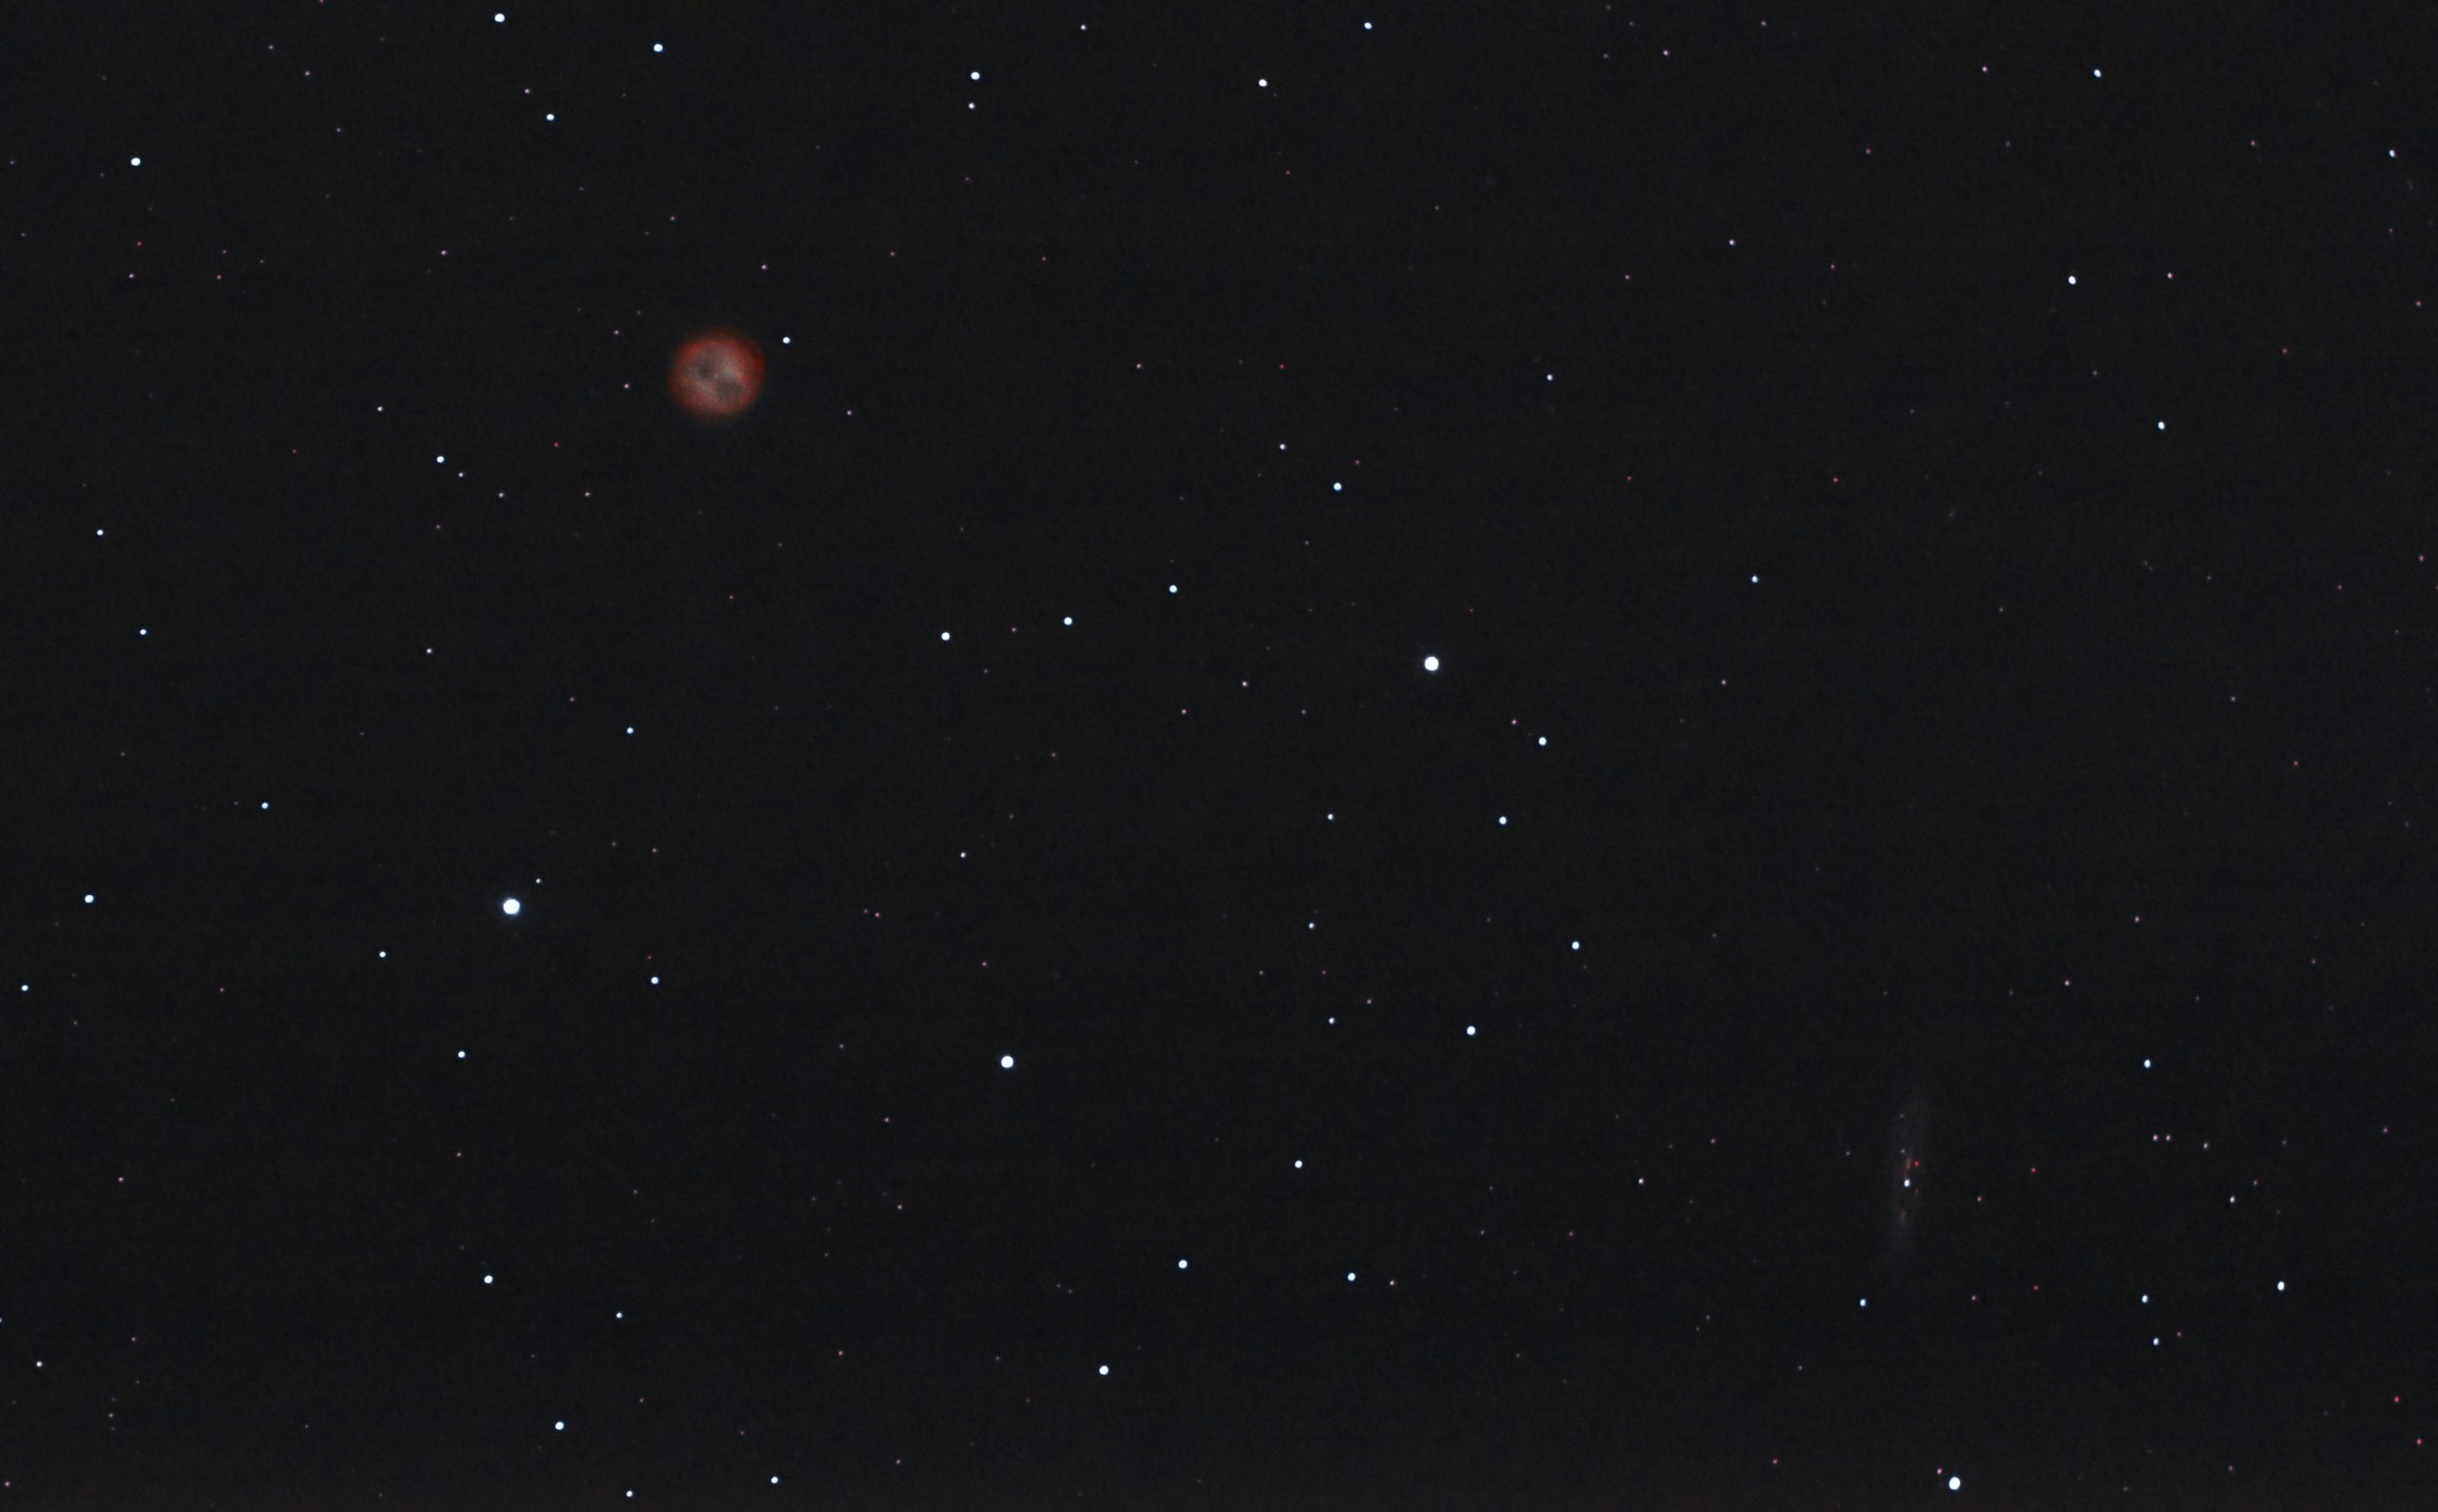
IC 443 on Feb 29, 2020 UT. 276×30 sec, Gain 37, Offset 15, QHY183c at -20C, UHC-S filter, Televue TV-85 at F/5.6.
First object of this night’s session was an ambitious attempt at the Jellyfish Nebula. Over 2 hrs and it still was not enough. I was hoping it would pick up more. The L-eNhance filter might do a better job. For nebulae, it is definitely more sensitive, just not as versatile as the UHC-S filter is.
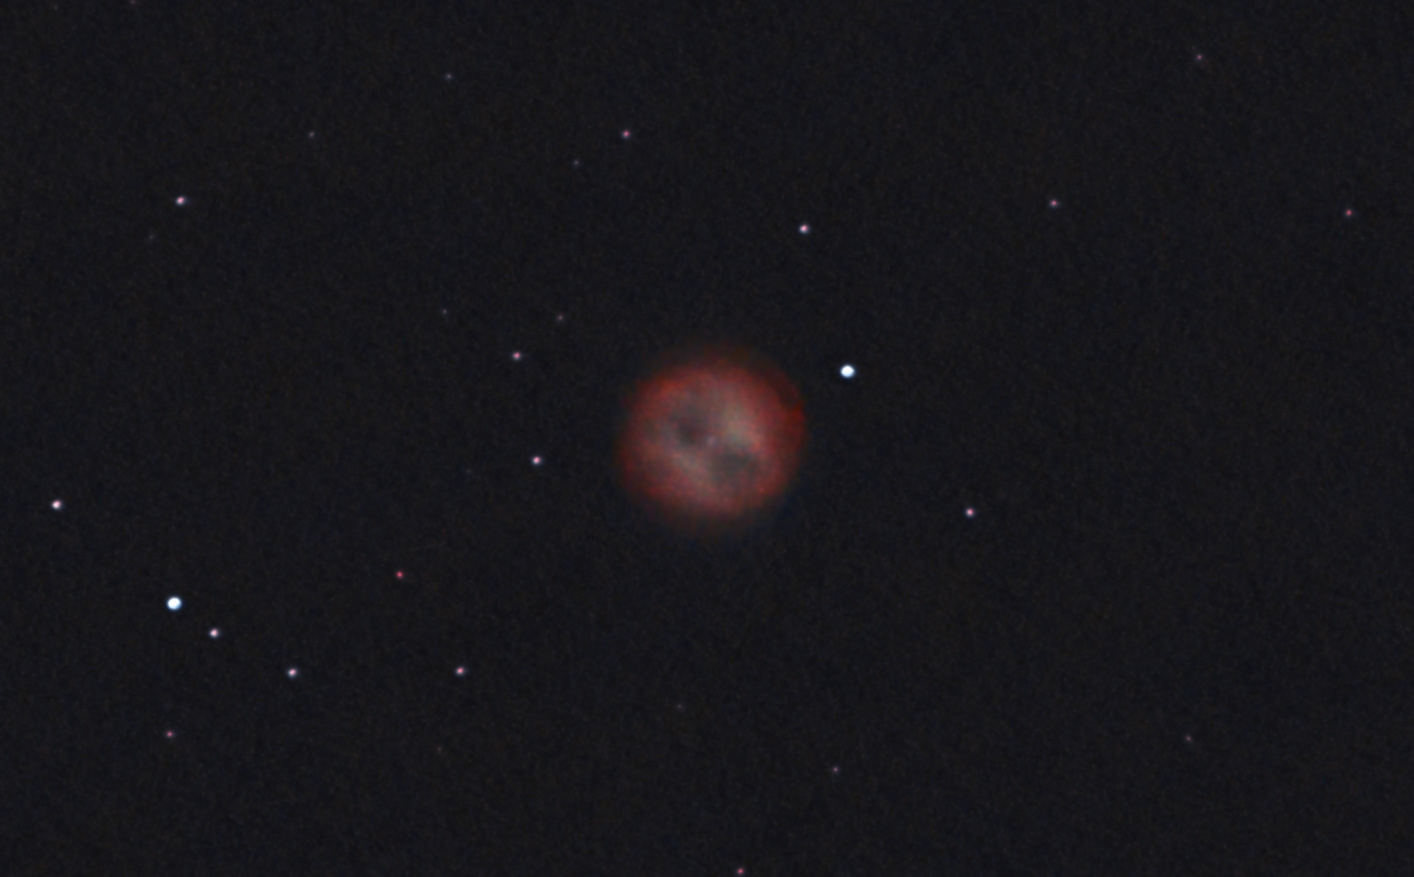
Crab Nebula on Feb 22, 2020. 122×30 sec @ Gain 37, Offset 15, -20C, QHY183c, UHC-S filter, Televue TV-85 at F/5.6.
Just over an hour’s worth of exposure for this one. This was the 2nd object of the night, the first being Betelgeuse, which was only a few frames.
I had better conditions for this shot at the beginning of the session than later in the night for other objects. Too bad it didn’t stay like that.
While shooting this, two older ladies came by to see what I was doing. Interesting conversation, but I think I went right over their heads trying to explain a supernova remnant. LoL! 🙂
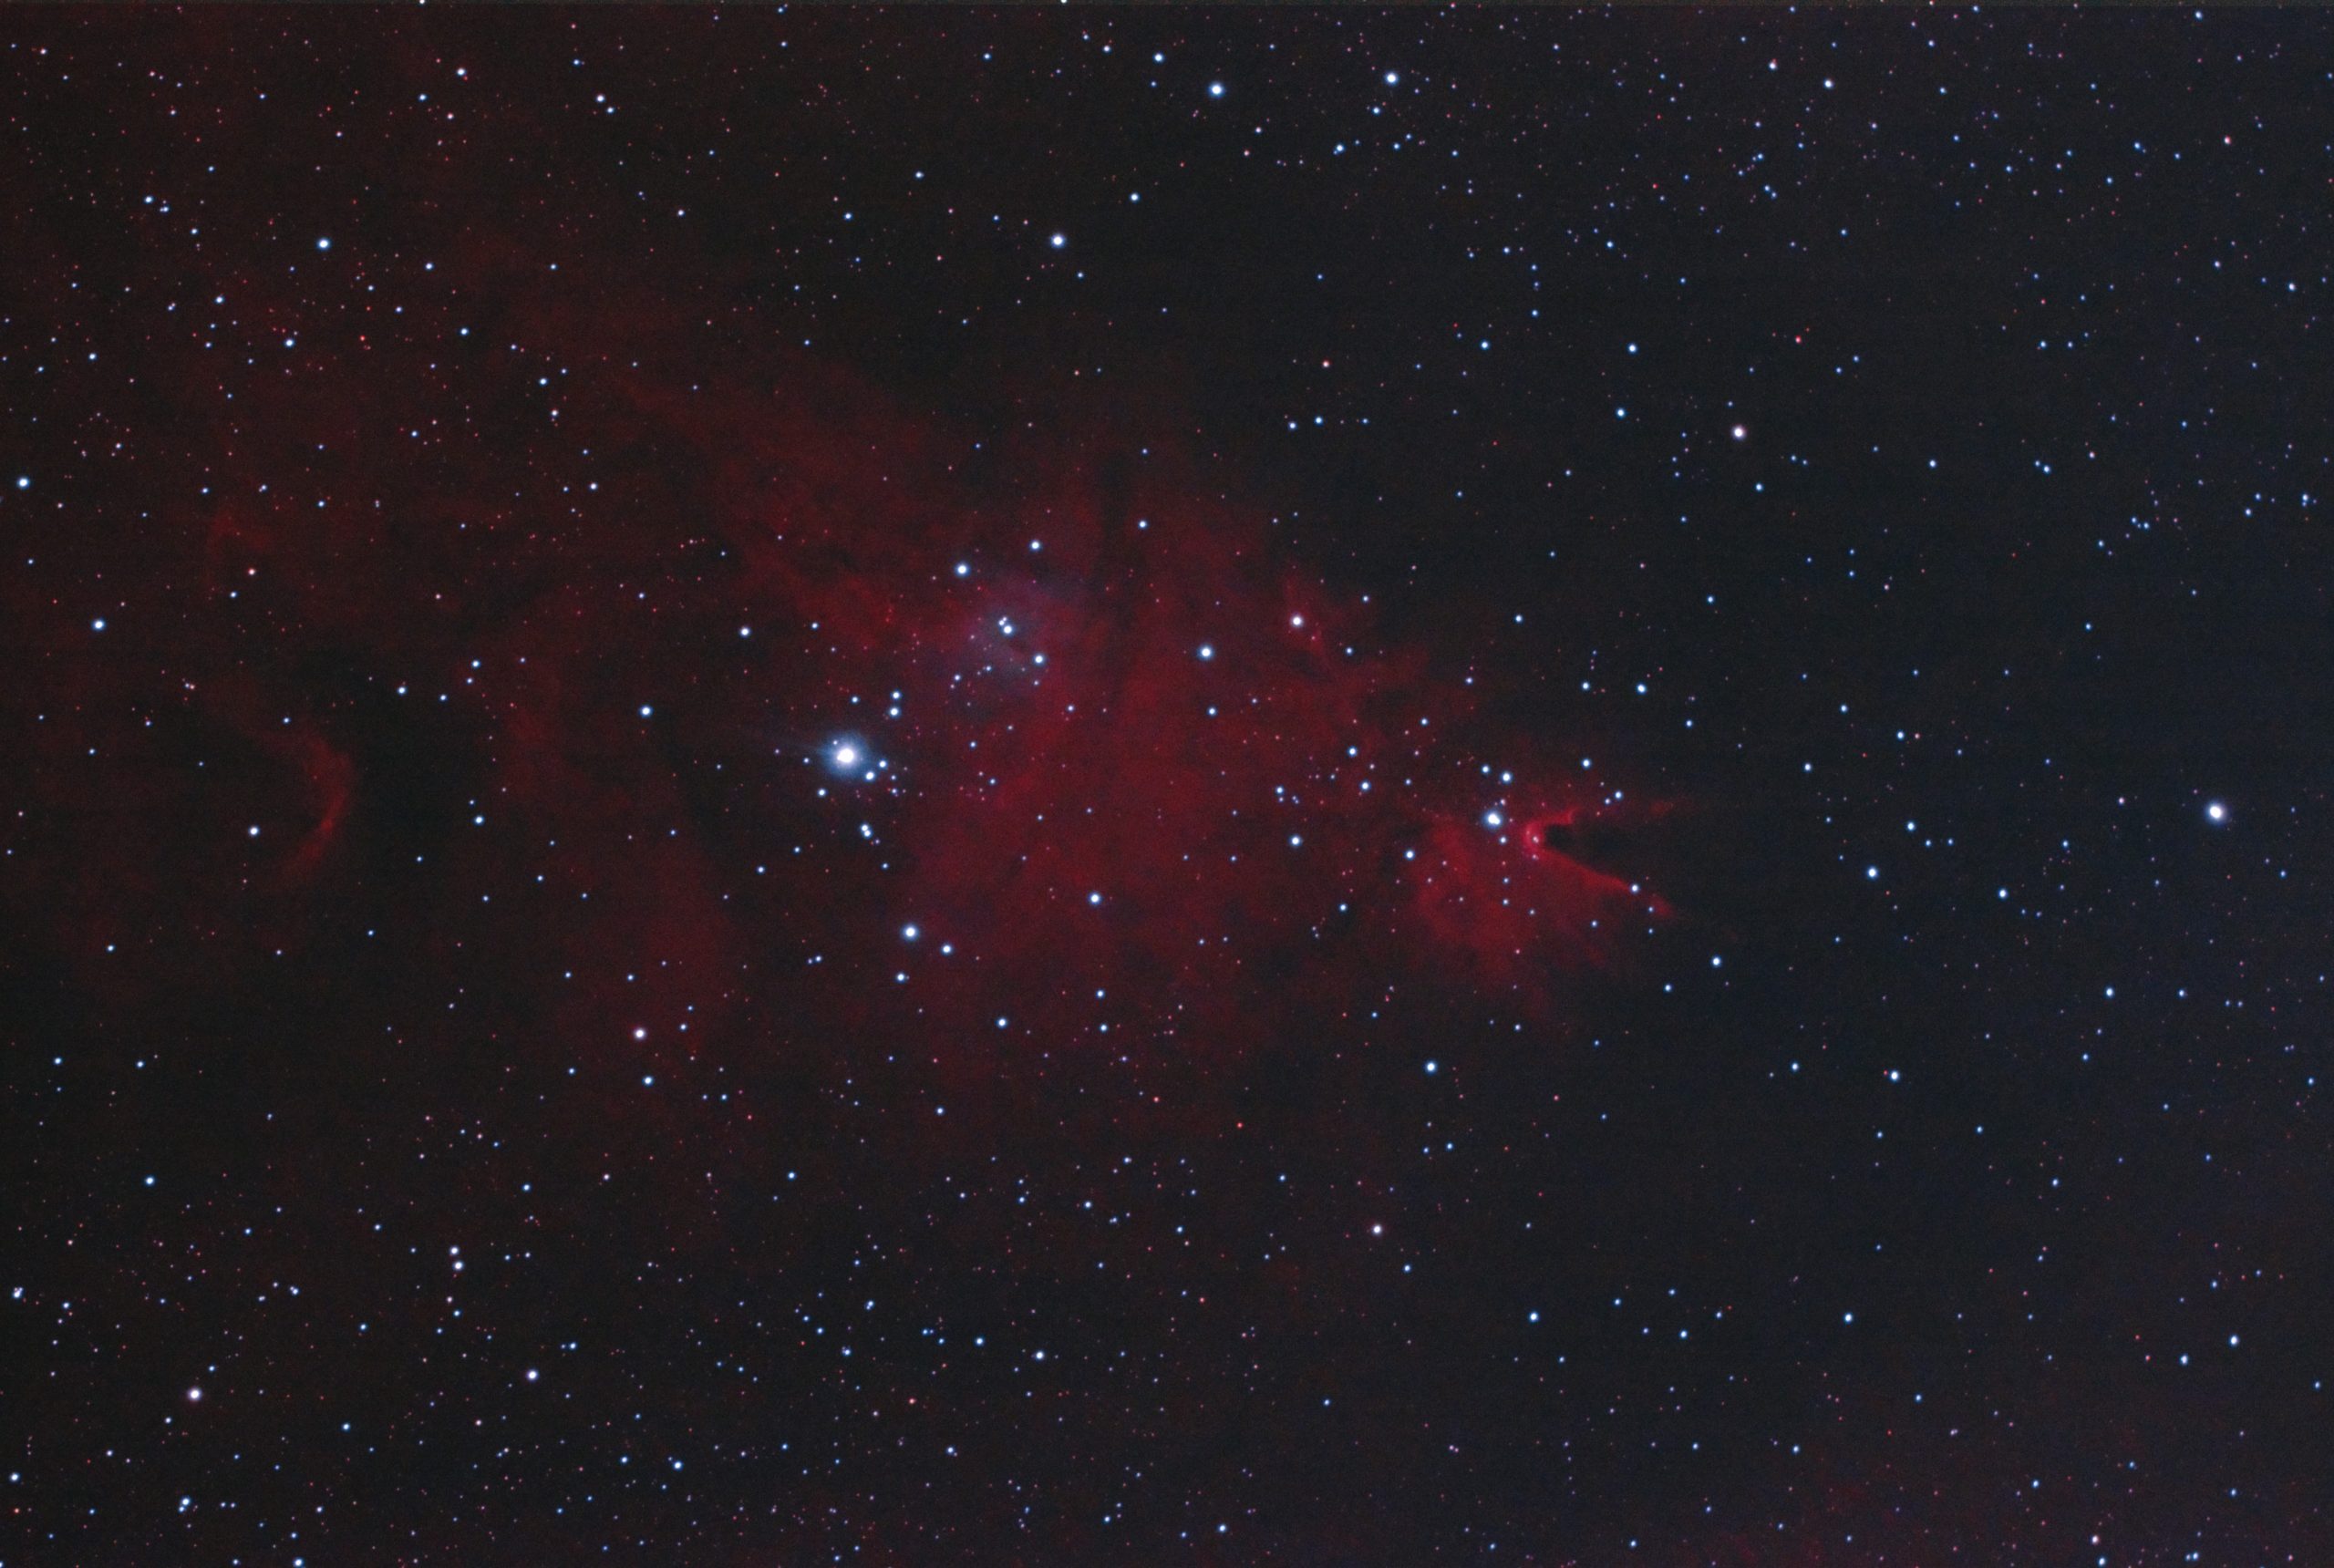
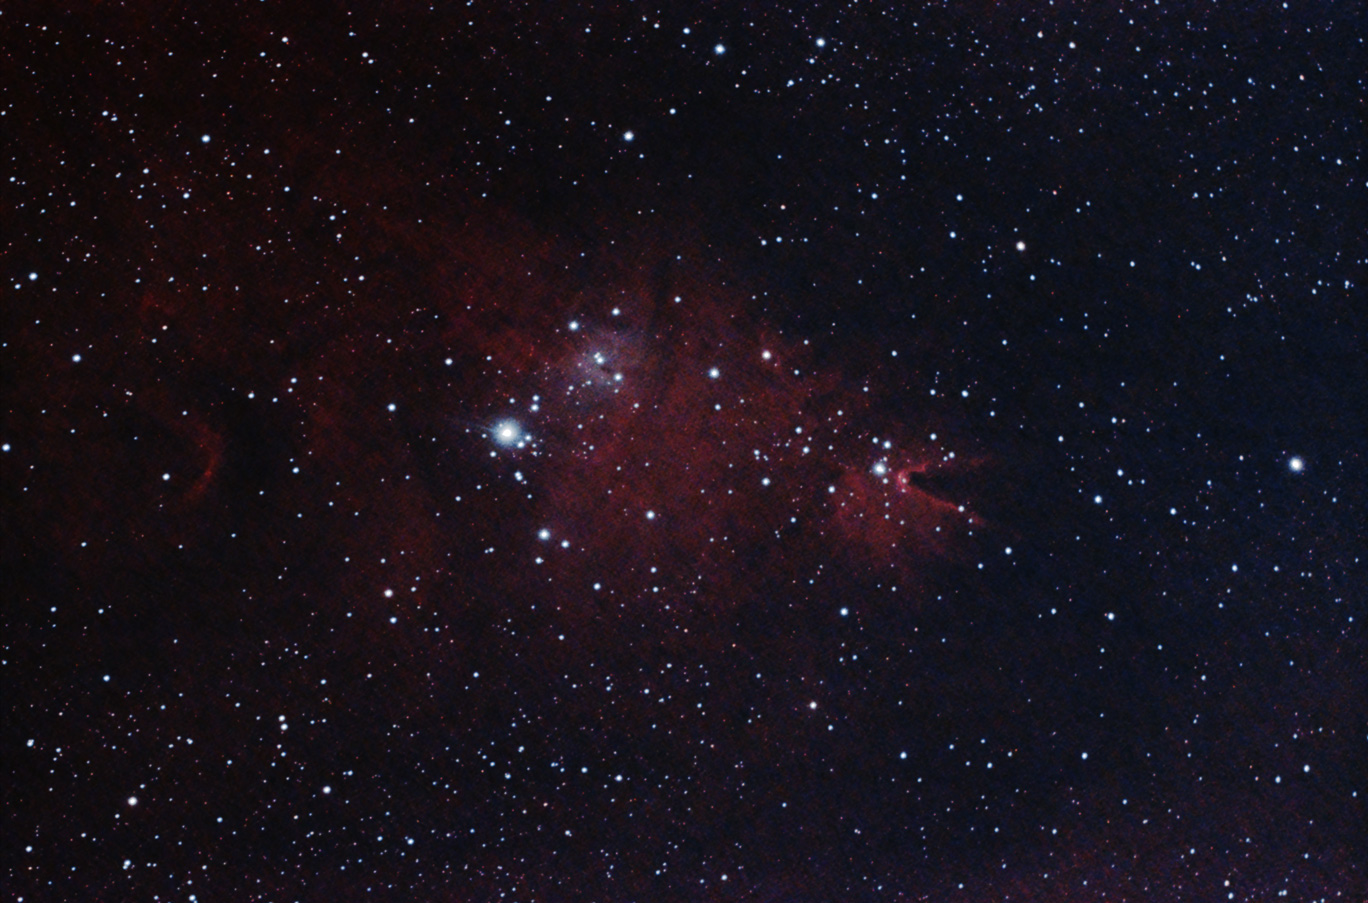
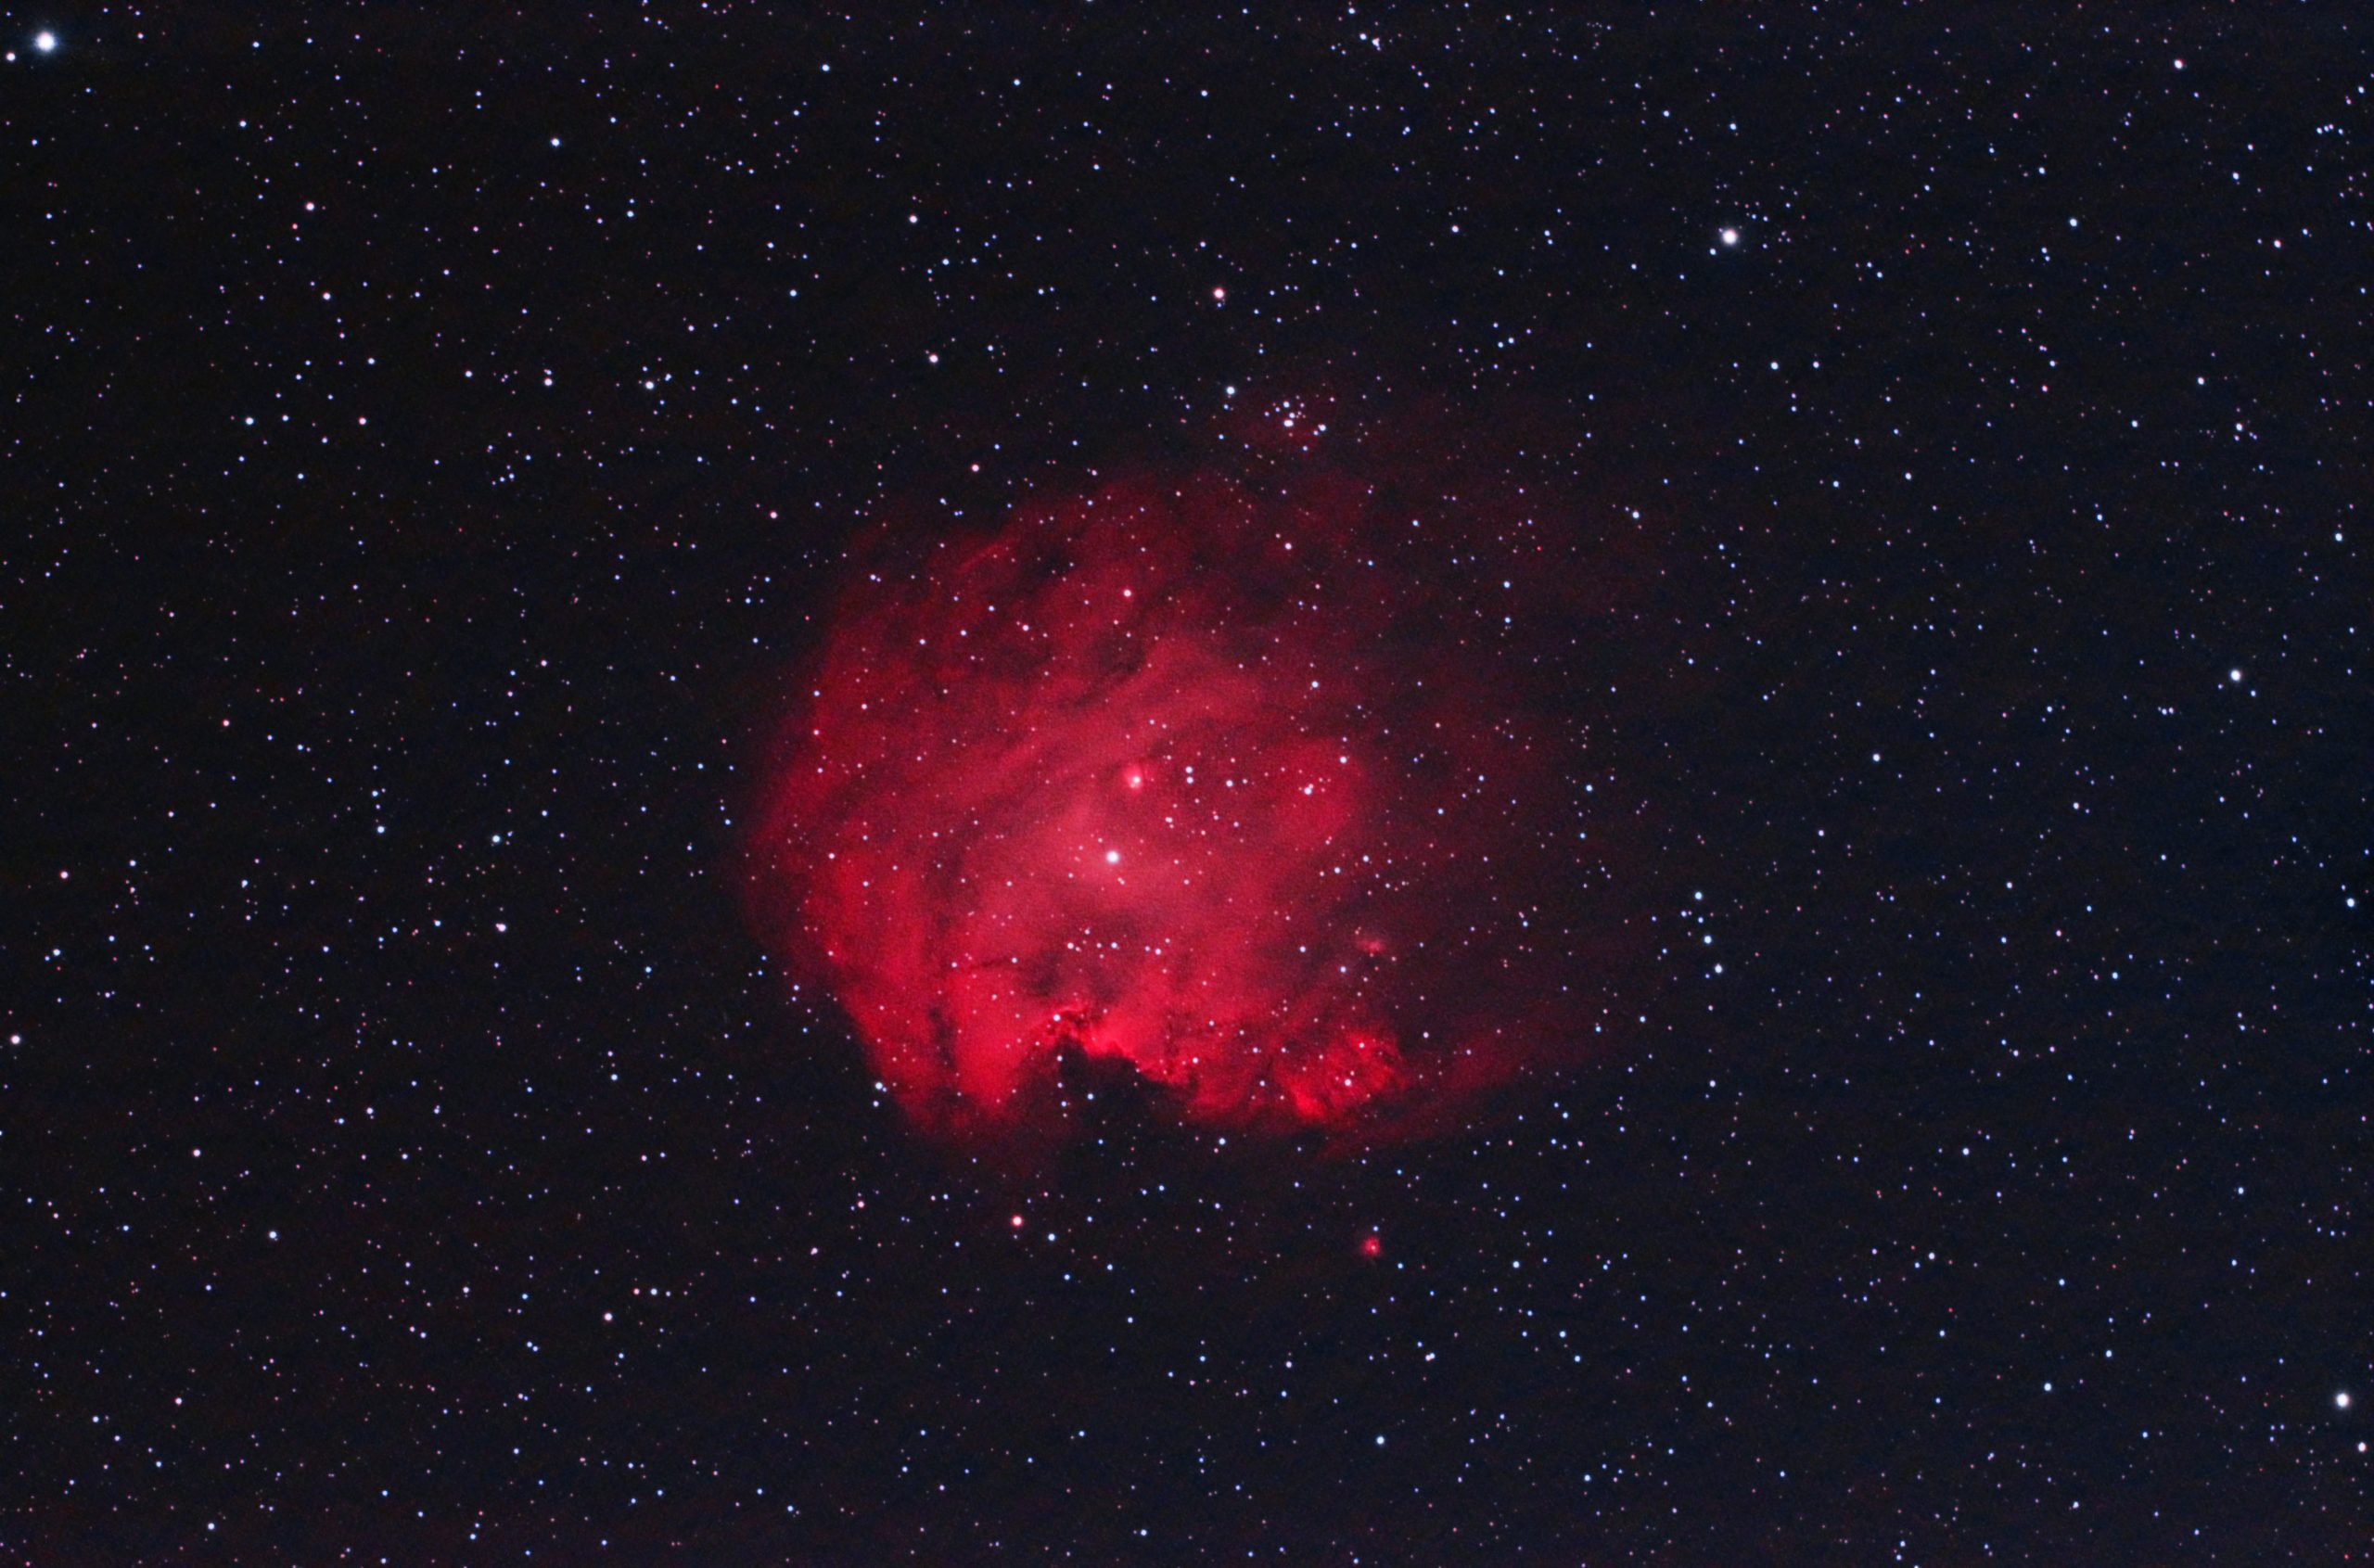
M78 taken on Jan 24, 2020. 300×30 sec, gain 42, offset 42, -20C, UHC-S filter, QHY183c, TV-85 at F/5.6.
This one was difficult to bring out the nebula since the UHC-S filter blocks some of the blue that this object predominantly shines in. But, it captures enough of the OIII, Hydrogen Alpha and Beta light to produce an image even from the heavily light-polluted location that I’ve been imaging from.
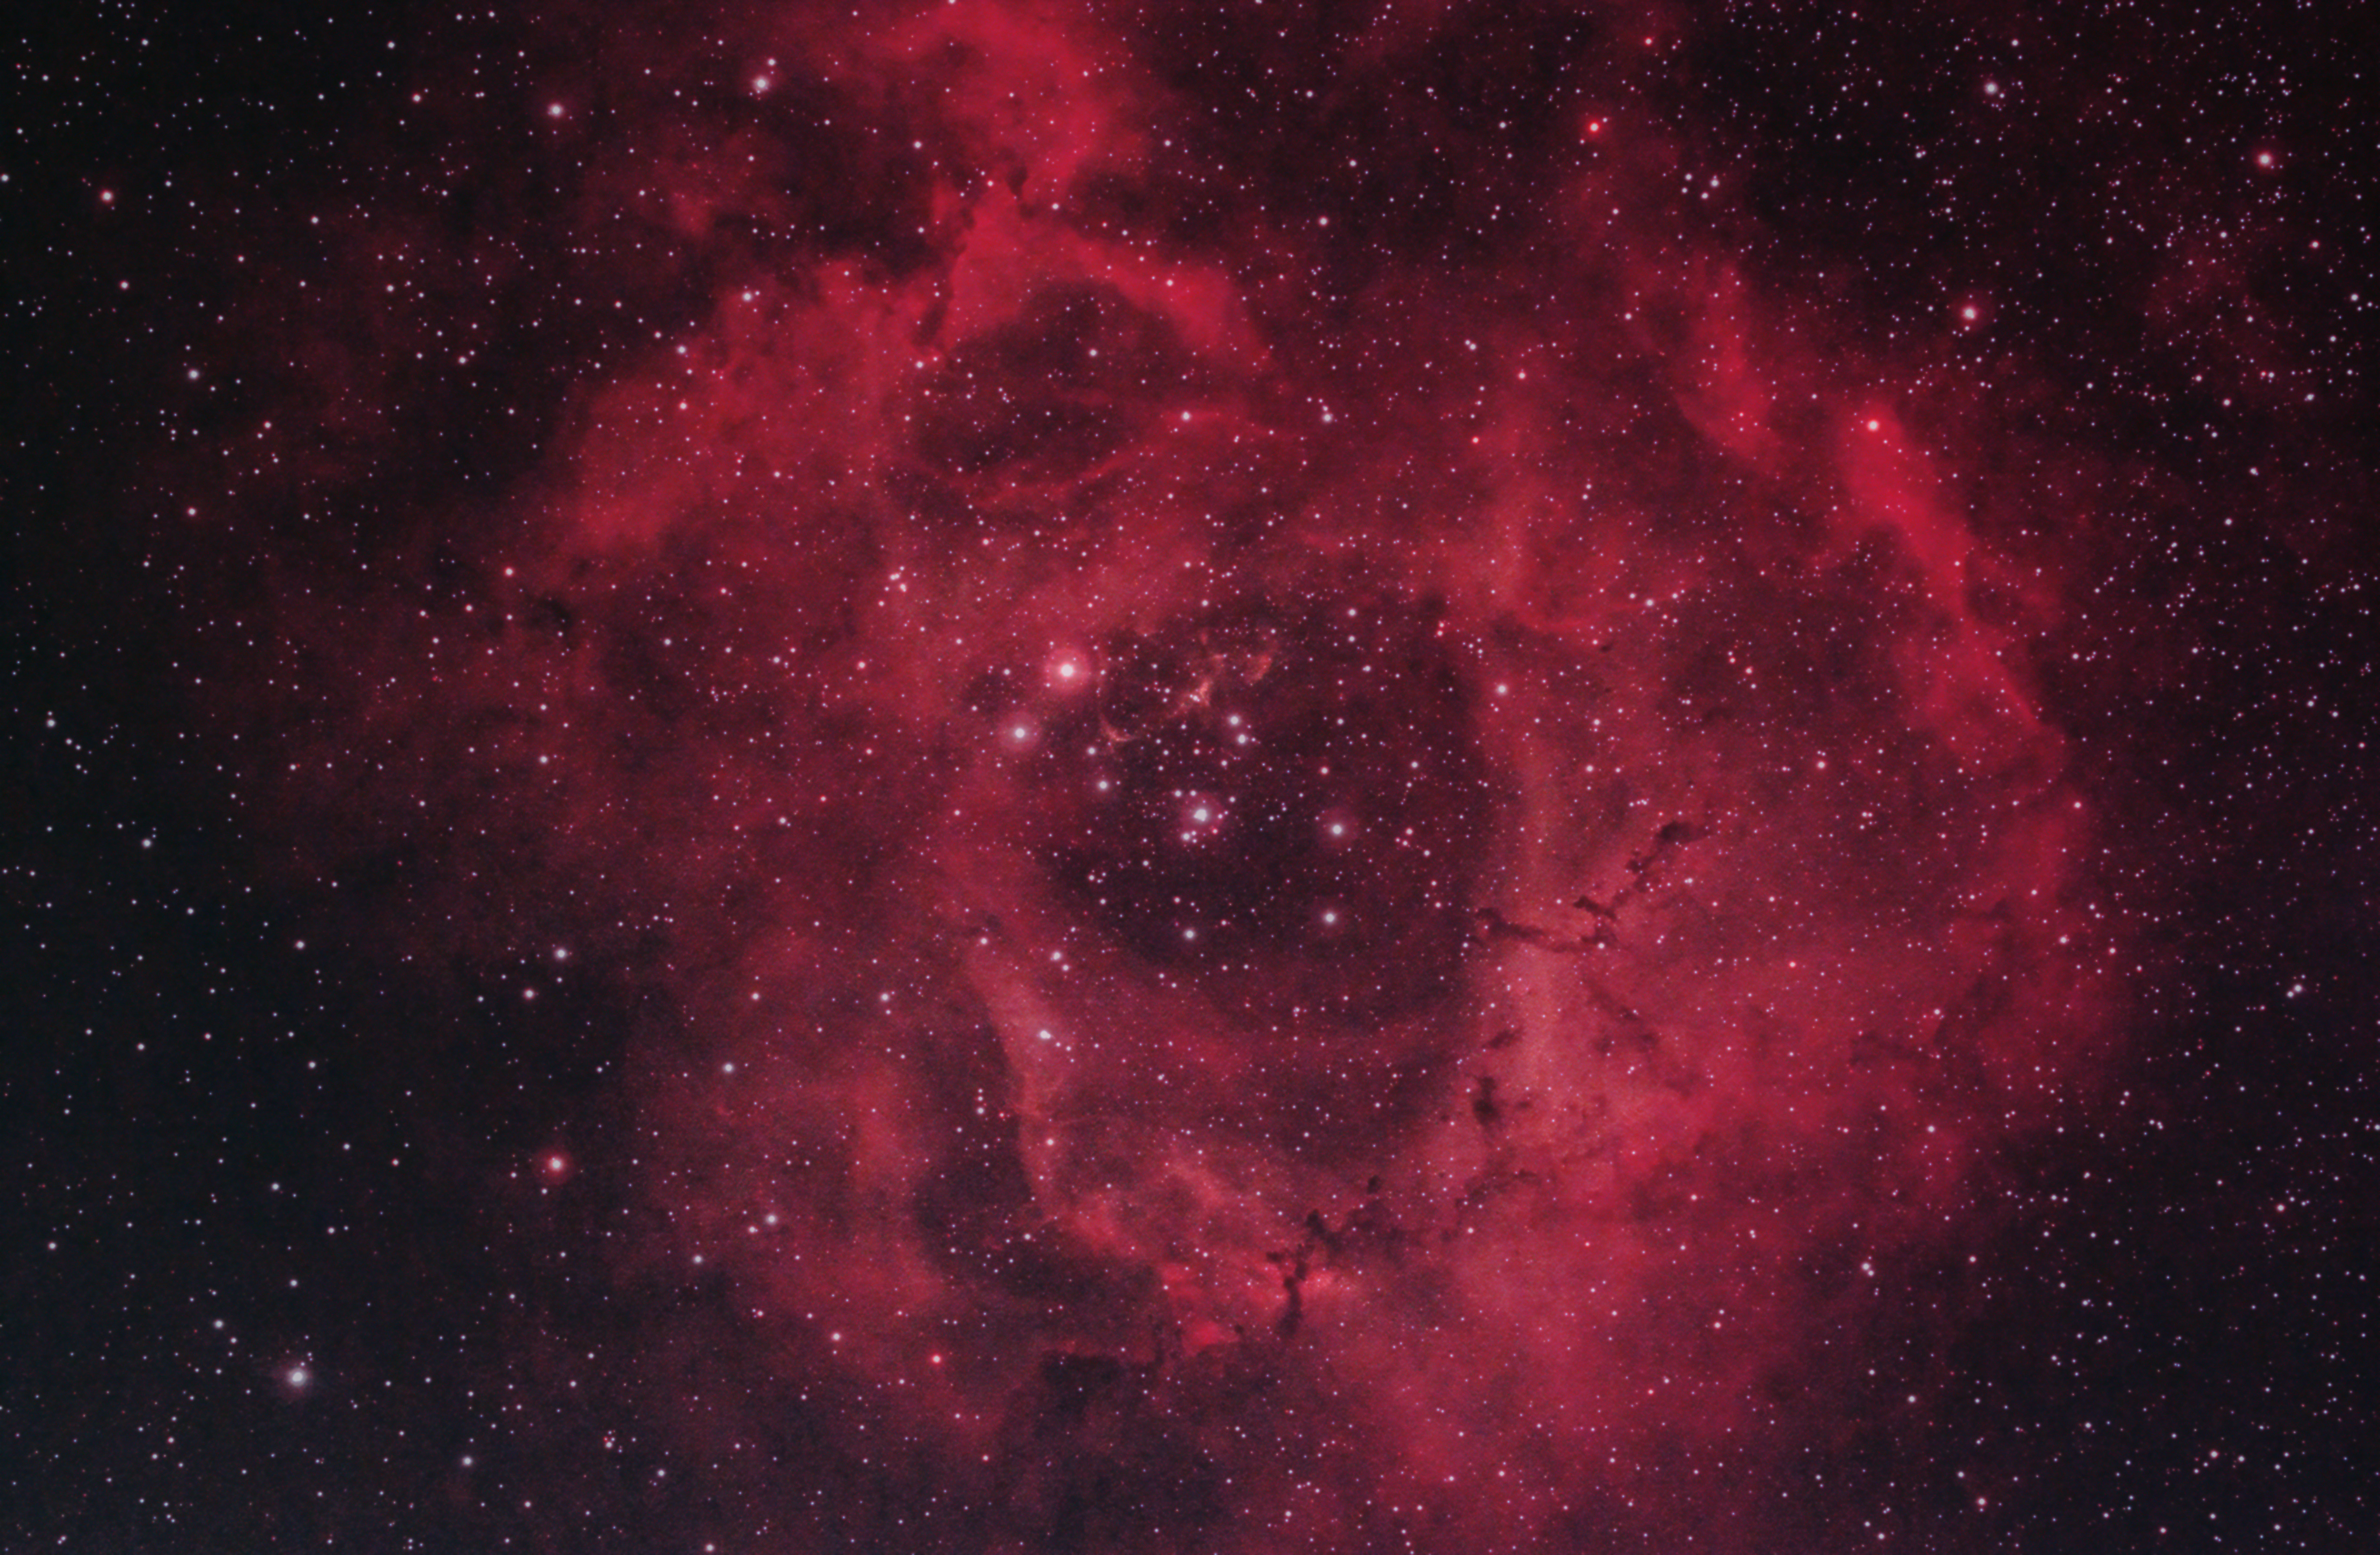
Rosette Nebula on Jan 25, 2020. 67×30 sec, Gain 42, Offset 25, -20C, UHC-S filter, QHY183c, Televue TV-85 at F/5.6, Atlas EQ-G w/EQMOD.
I was surprised how well this came out with only about an hour of data. I was after galaxies this night and I only took this to kill time. Even the 33 minutes worth I posted initially looked half-decent. I will have to devote a session to this one and possibly use the L-eNhance filter instead of the UHC-S.
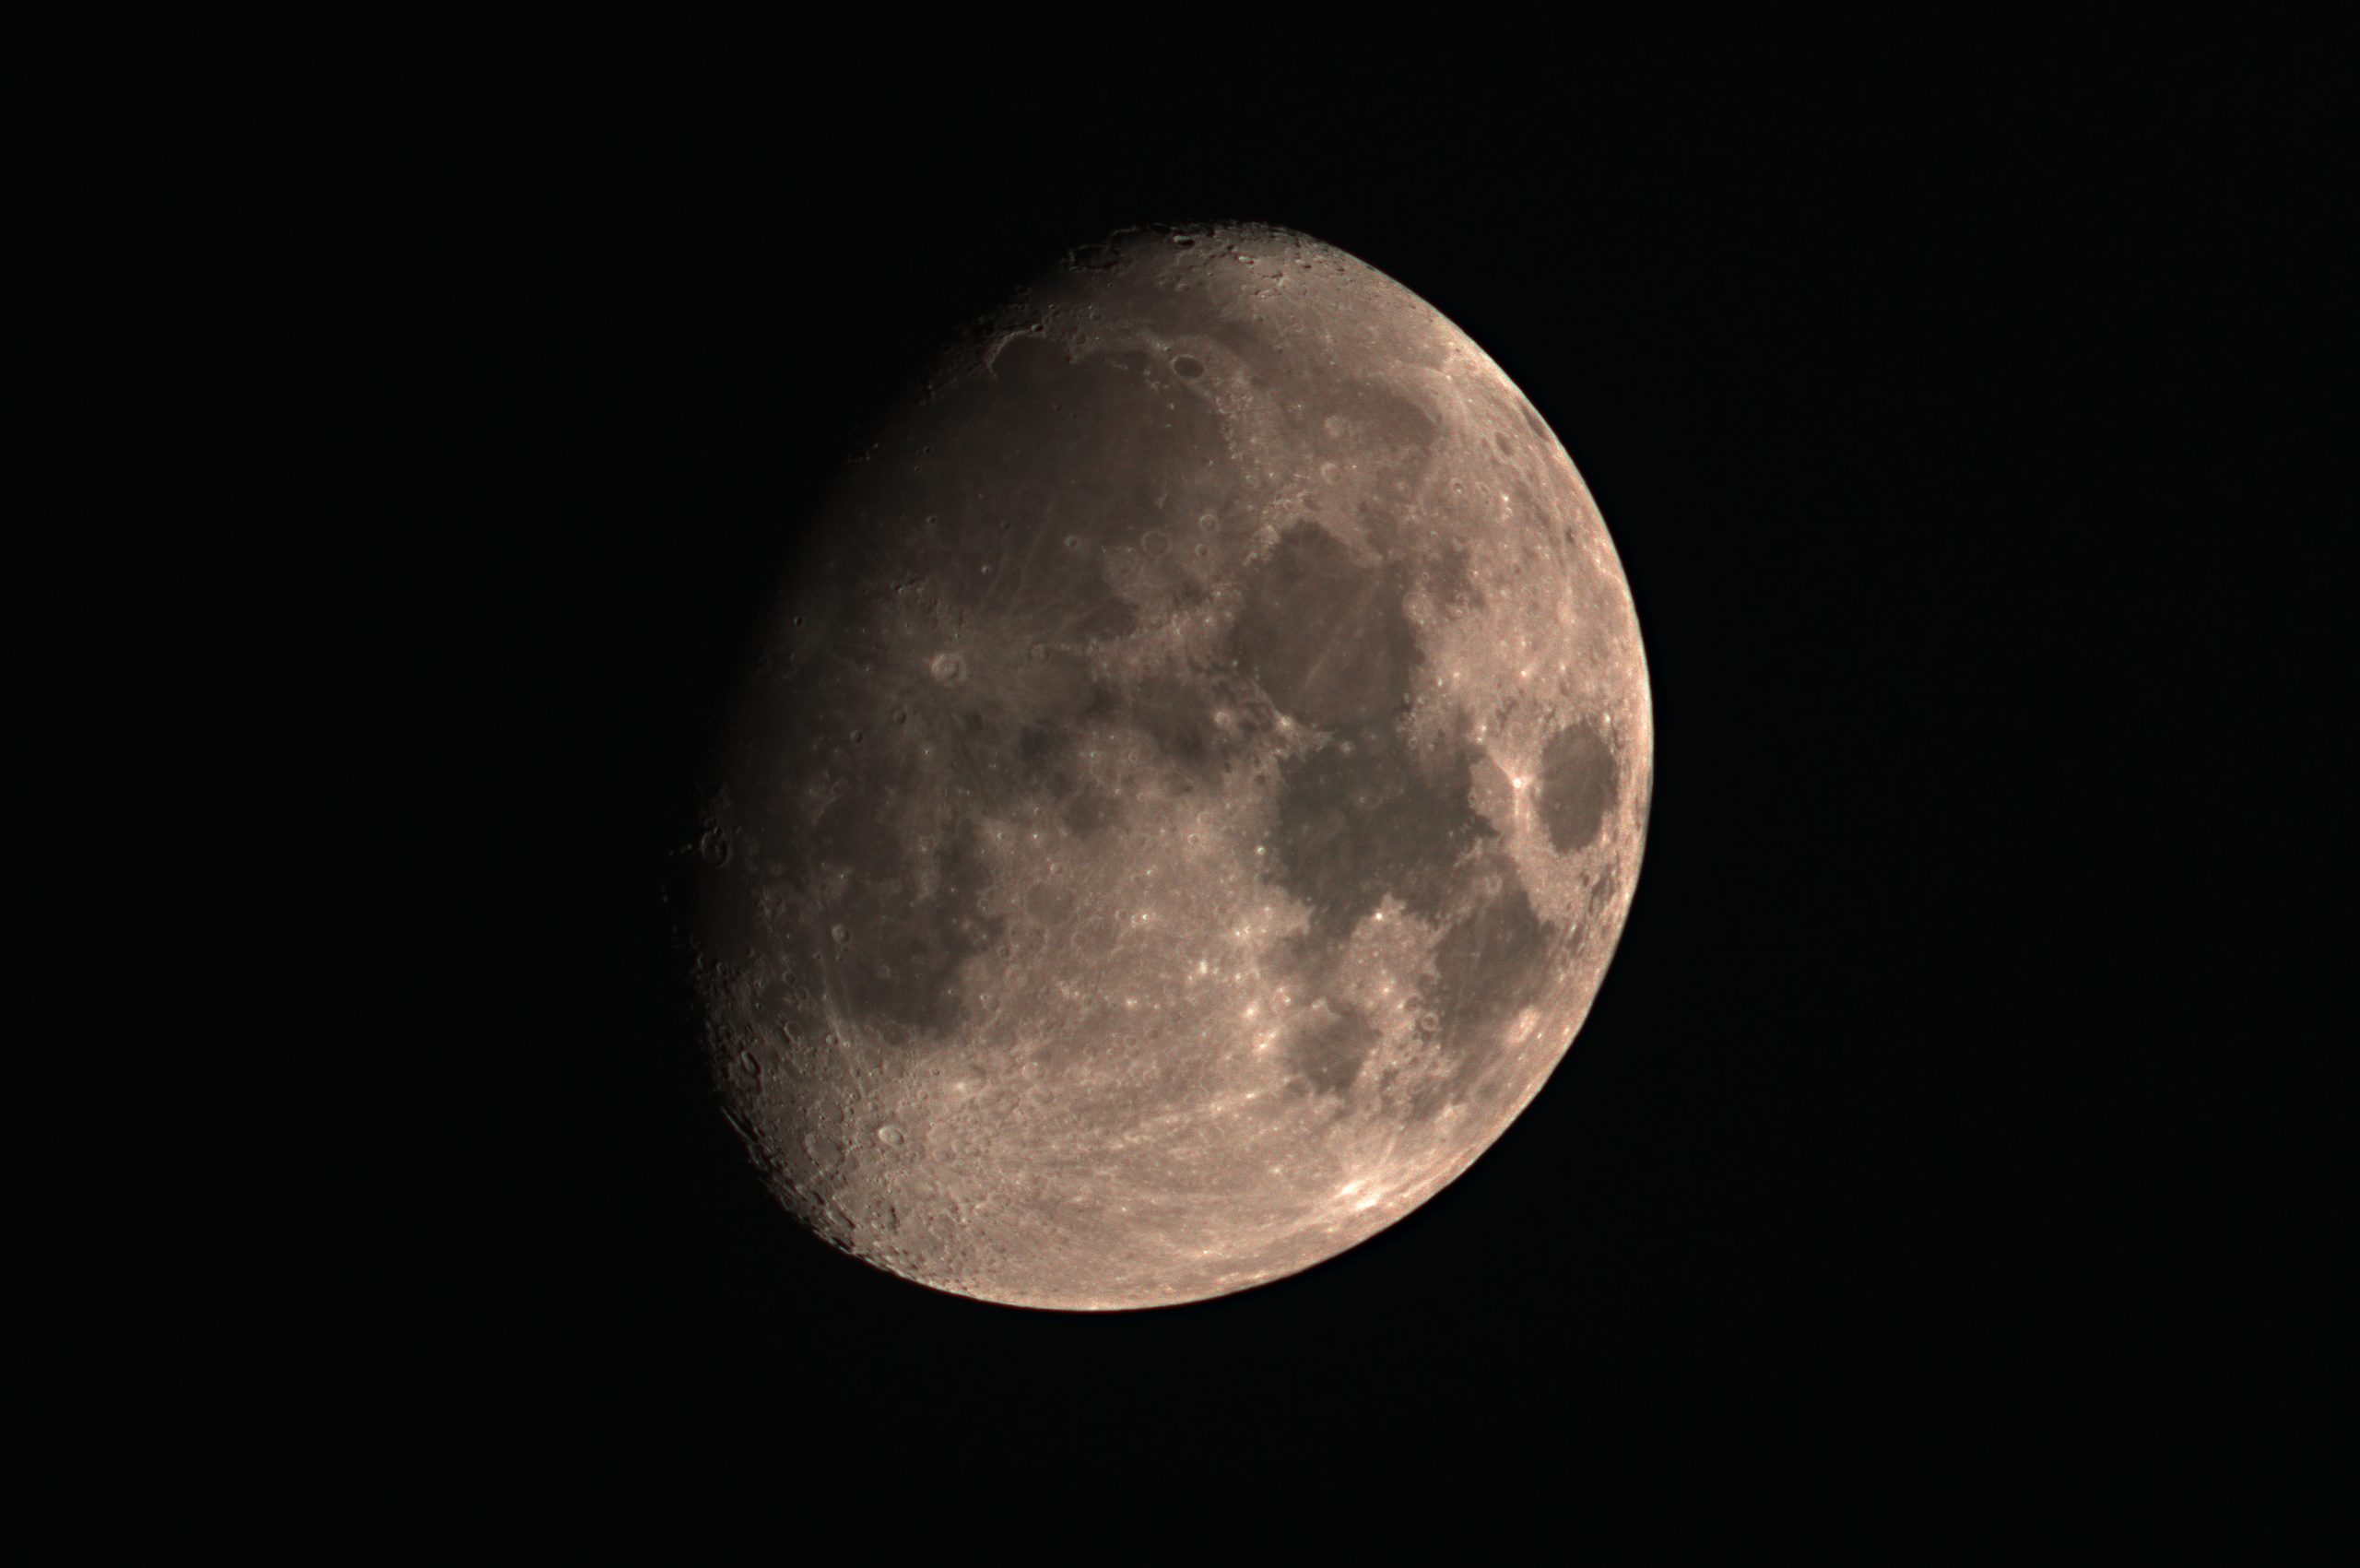
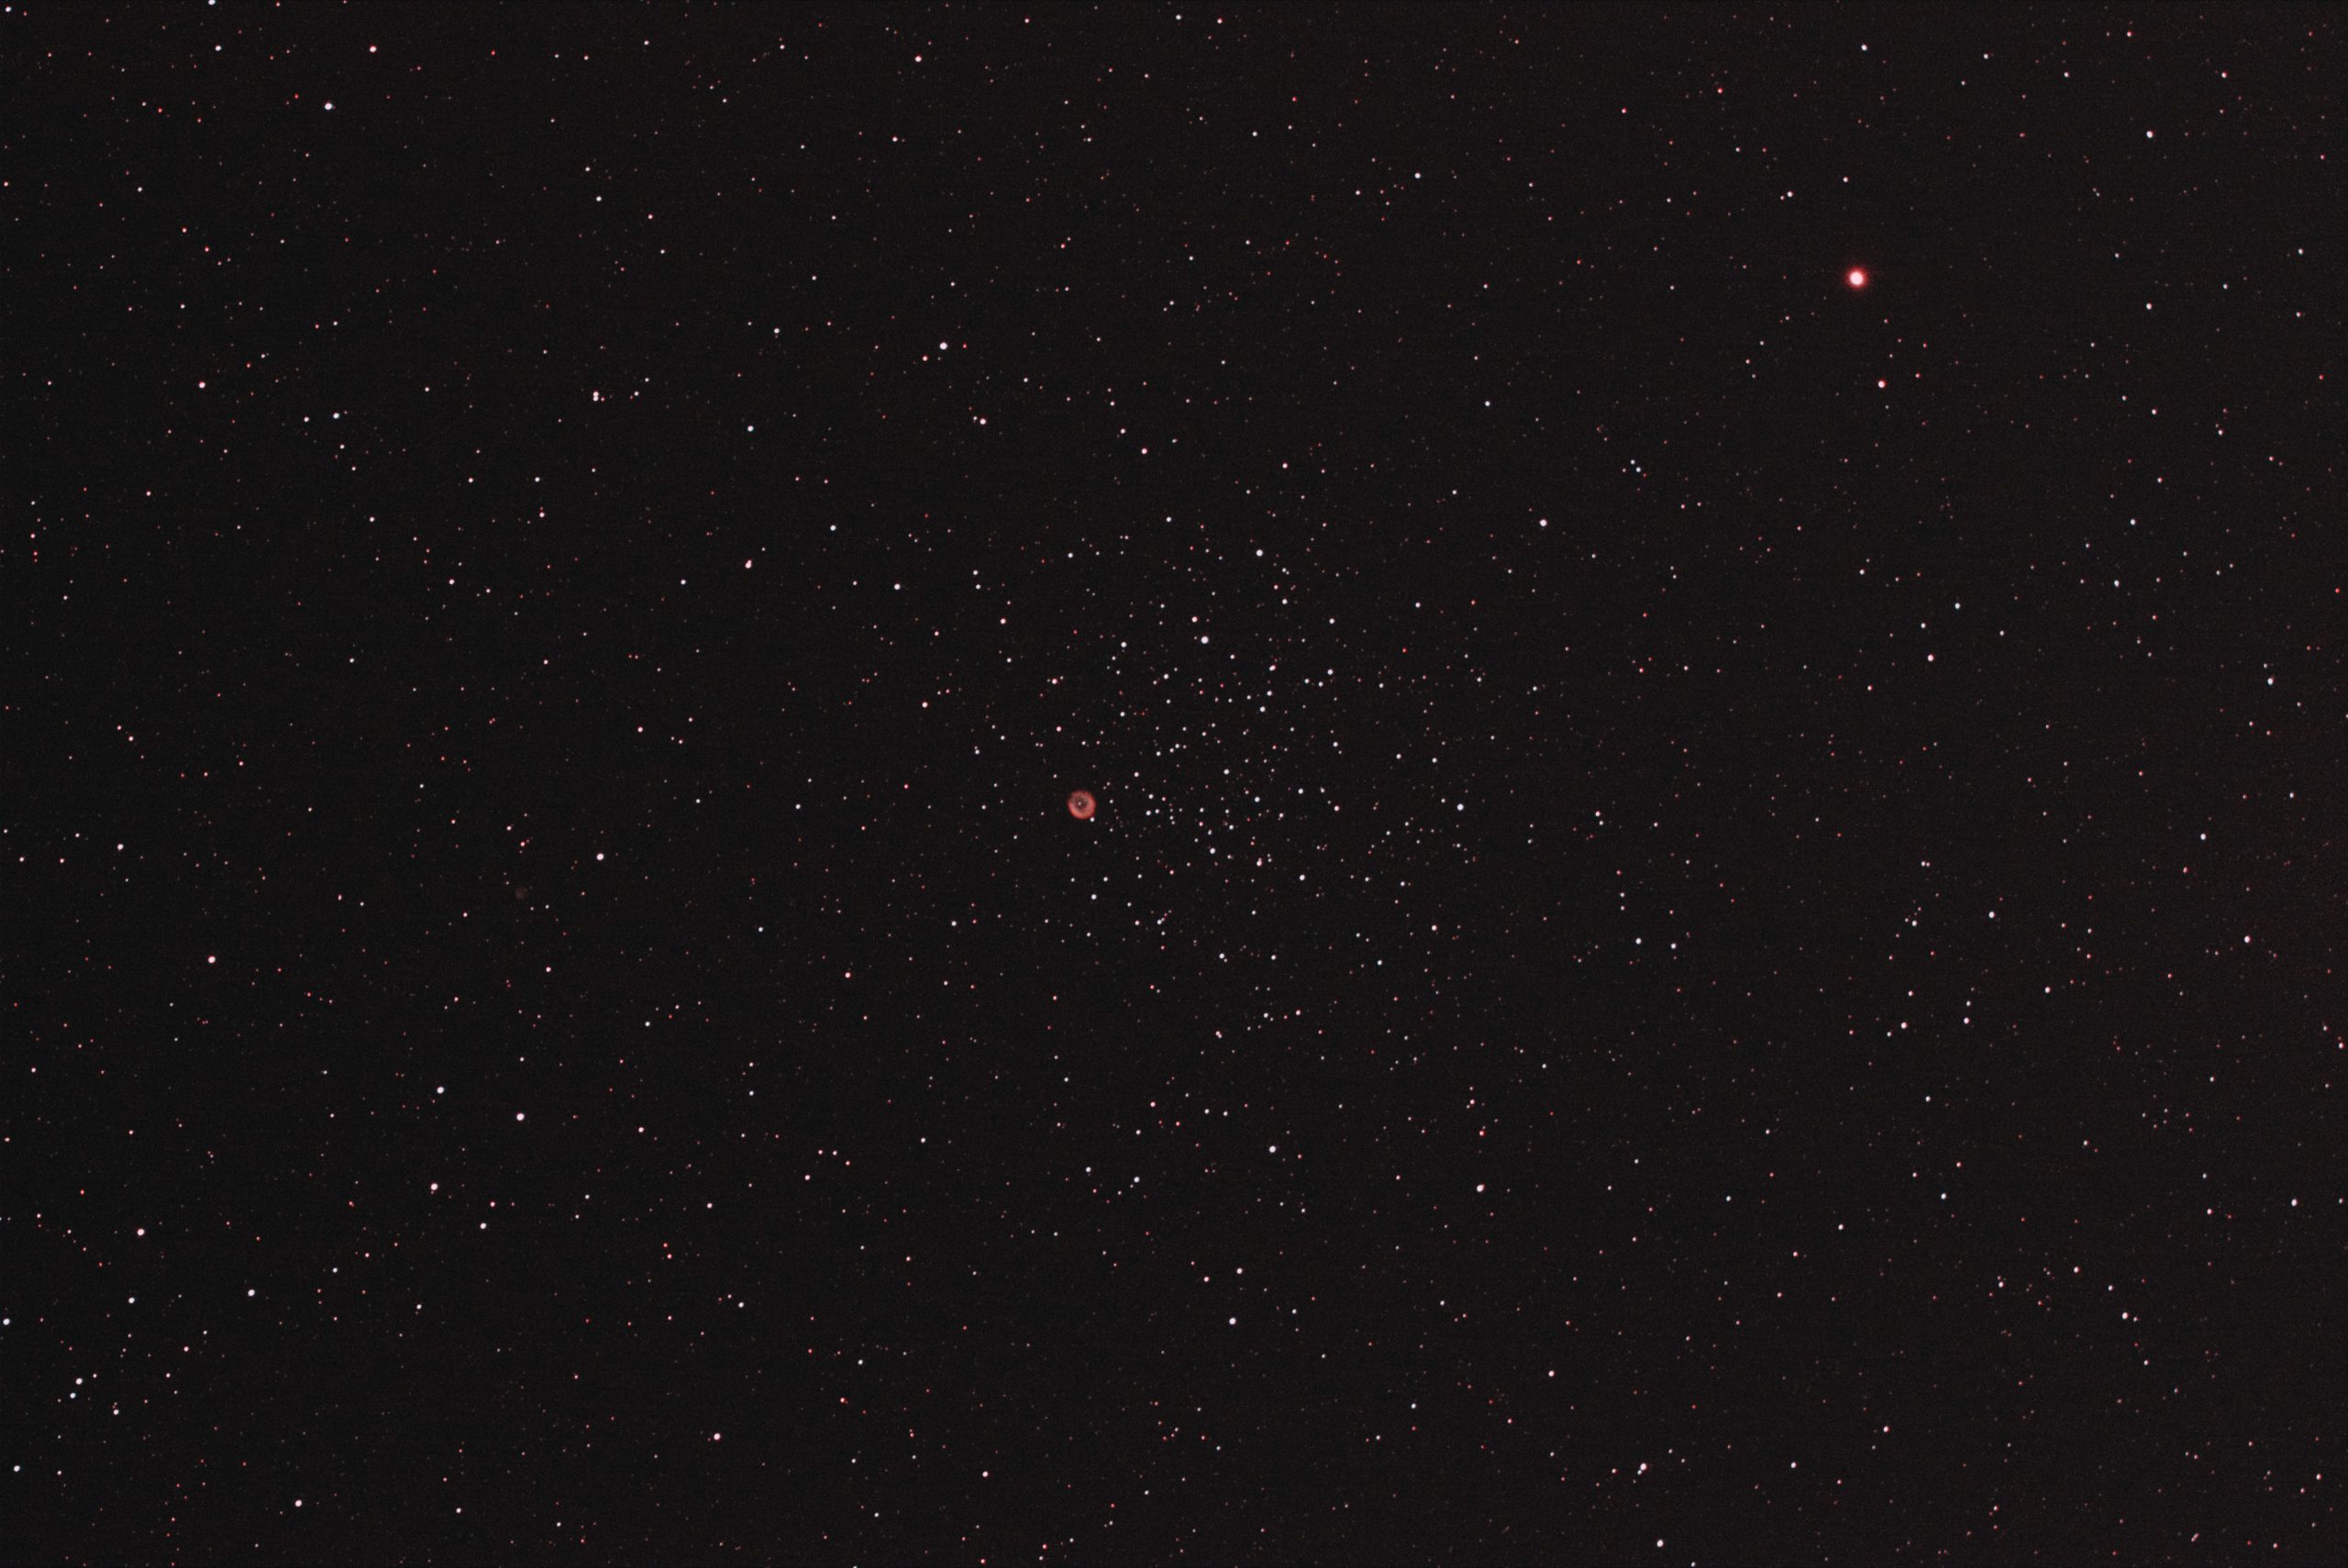
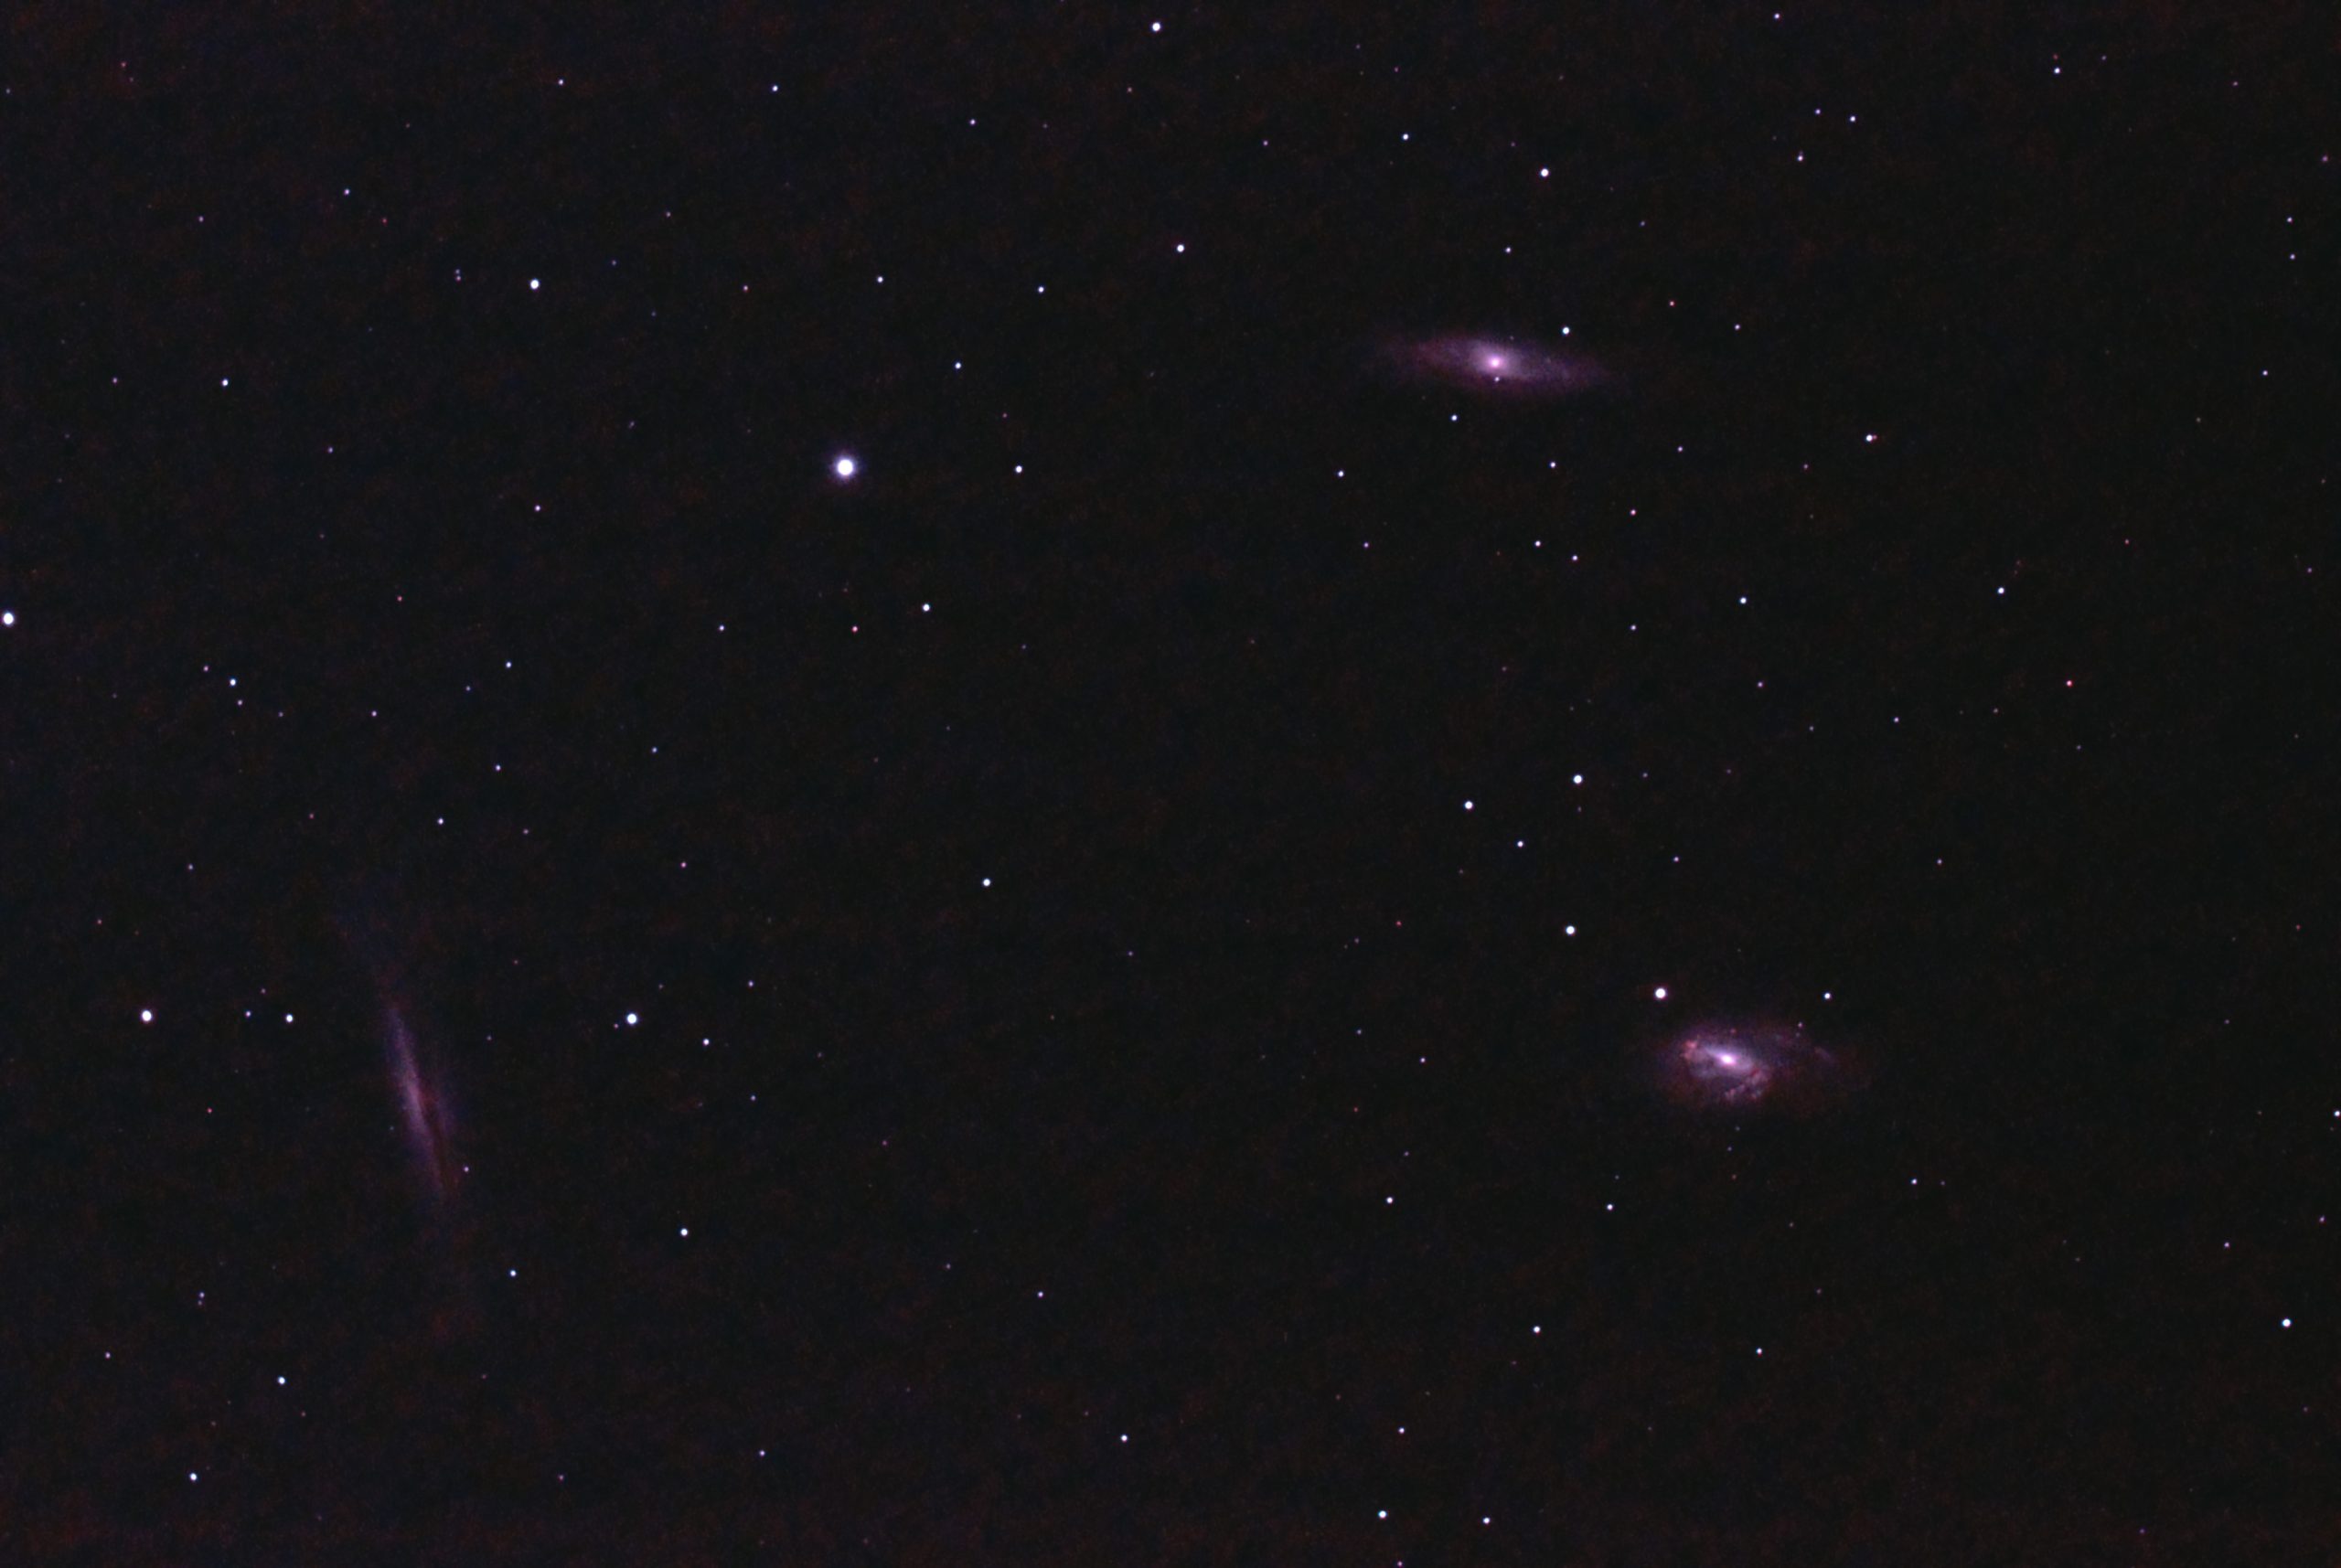
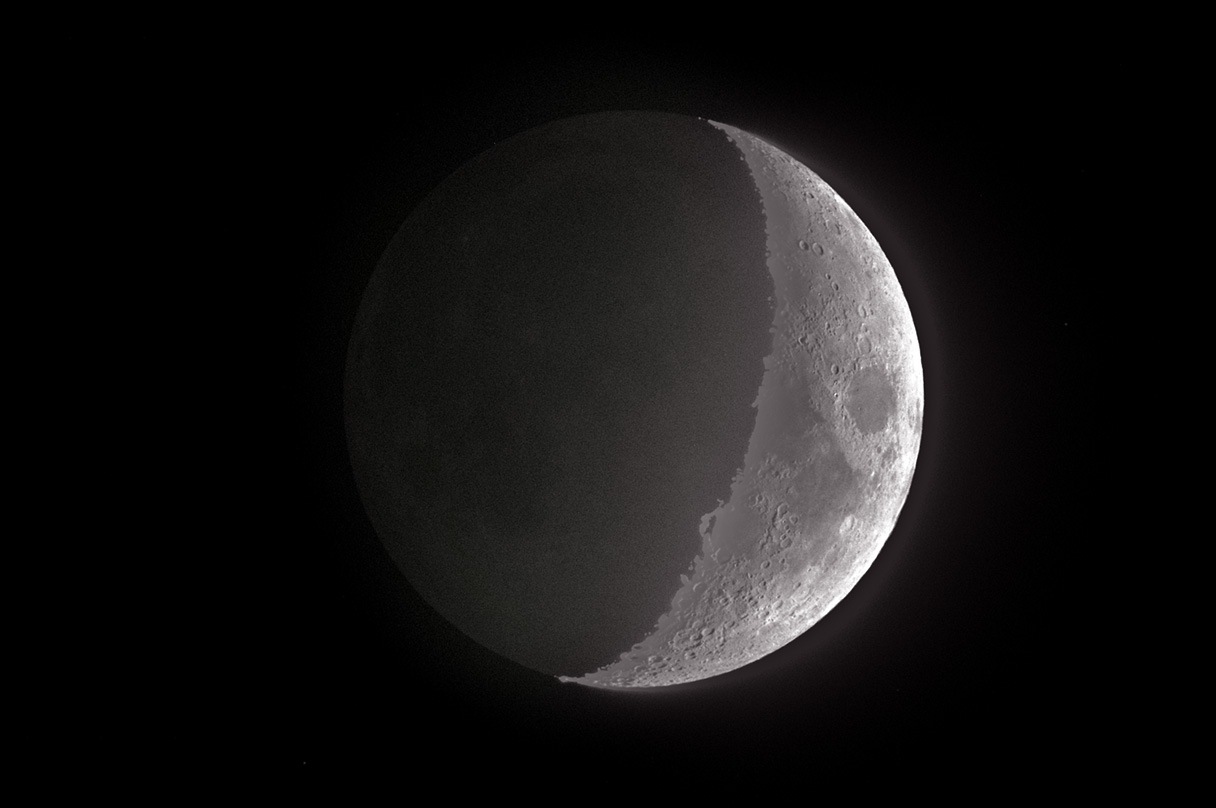
The Moon. 5 frames stacked in SharpCap 3.2 LiveStacking. QHY183c, L-eNhance, TV-85 at F/5.6.The Ghost Nebula and Gamma Cass. QHY183c, 125 x 30 sec, Gain 42, Offset 42, -20C, L-eNhance filter, TV-85 at F/5.6.NGC7822 and Ced 214. QHY183c, 122 x 30 sec, Gain 42, Offset 42, -20C, L-eNhance filter, TV-85 at F/5.6.The Cone Nebula. QHY183c, 193 x 30 sec, Gain 42, Offset 42, -20C, L-eNhance filter, TV-85 at F/5.6.M46 and NGC 2438. QHY183c, 18 x 30 sec, Gain 42, Offset 42, -20C, L-eNhance filter, TV-85 at F/5.6.Leo Trio. QHY183c, 120 x 30 sec, Gain 42, Offset 42, -20C, L-eNhance filter, TV-85 at F/5.6.
Six images bagged in one night, although a few need at least another nights worth of additional time. Big city light pollution was circumvented with an Optolong L-eNhance filter.
30 second sub-images for the DSO’s. The moon was 5 frames stacked in SharpCap 3.2. The Cone Nebula has 130 subs from last night and 63 from a previous session. I also shot M51, but it was only a few frames before twilight and was not really enough for a display image.
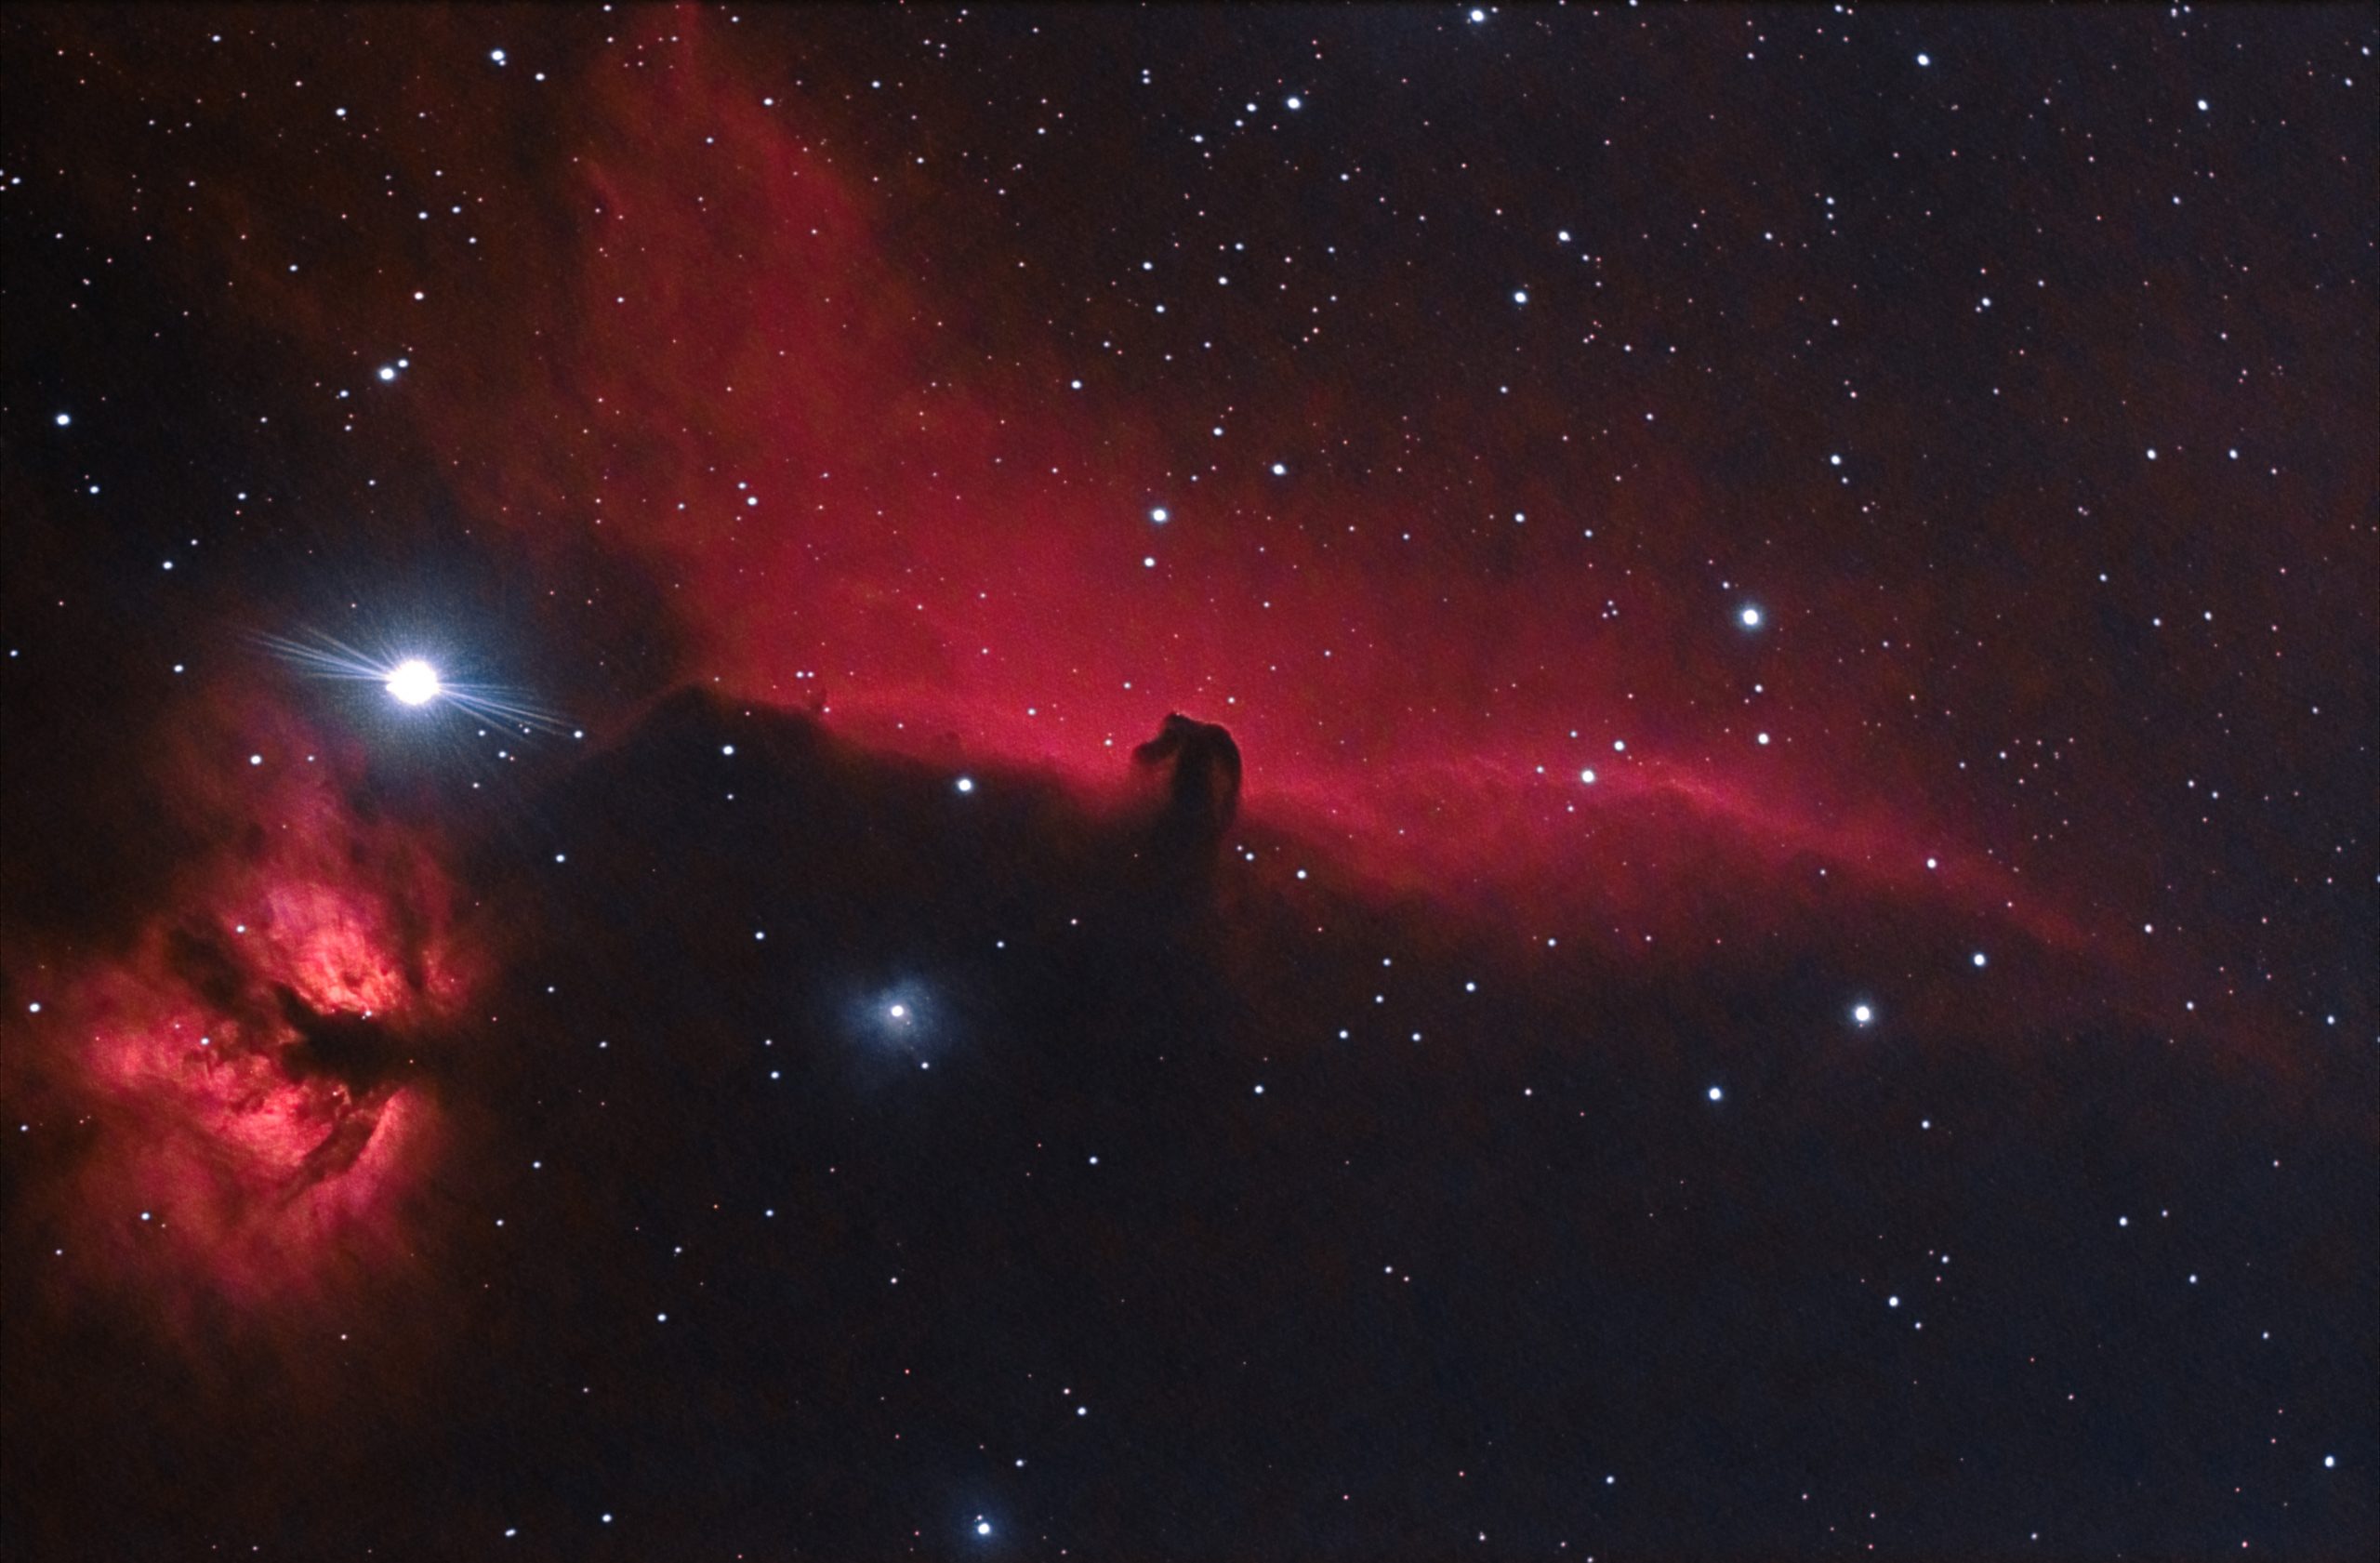
Horse Head Nebula – 123×30 sec @ Gain 42, Offset 42, -20C, QHY183c plus L-eNhance filter, TV-85 at F/5.6.Owl Nebula and M108 – – 127×30 sec @ Gain 42, Offset 42, -20C, QHY183c plus L-eNhance filter, TV-85 at F/5.6.Owl Nebula Detail – 127×30 sec @ Gain 42, Offset 42, -20C, QHY183c plus L-eNhance filter, TV-85 at F/5.6.A Work in Progress., the Cone Nebula – 63×30 sec @ Gain 42, Offset 42, -20C, QHY183c plus L-eNhance filter, TV-85 at F/5.6.
An early morning imaging session. I setup after 1:00 am and imaged until sunrise on Tuesday, Dec 3, 2019. I managed to get decent amounts of data on the Horse Head and Owl nebulae, but I only got a little bit of the Cone before it went behind trees.
I will definitely want to shoot the Cone again with 2 more sets of data – one with the Optolong L-eNhance filter and one with a UHC filter. It is a beautiful area with broadband filters, but too much LP from my current site to do it justice with one of those. I think the two filters together shooting separate sets might do it justice from this place, though.
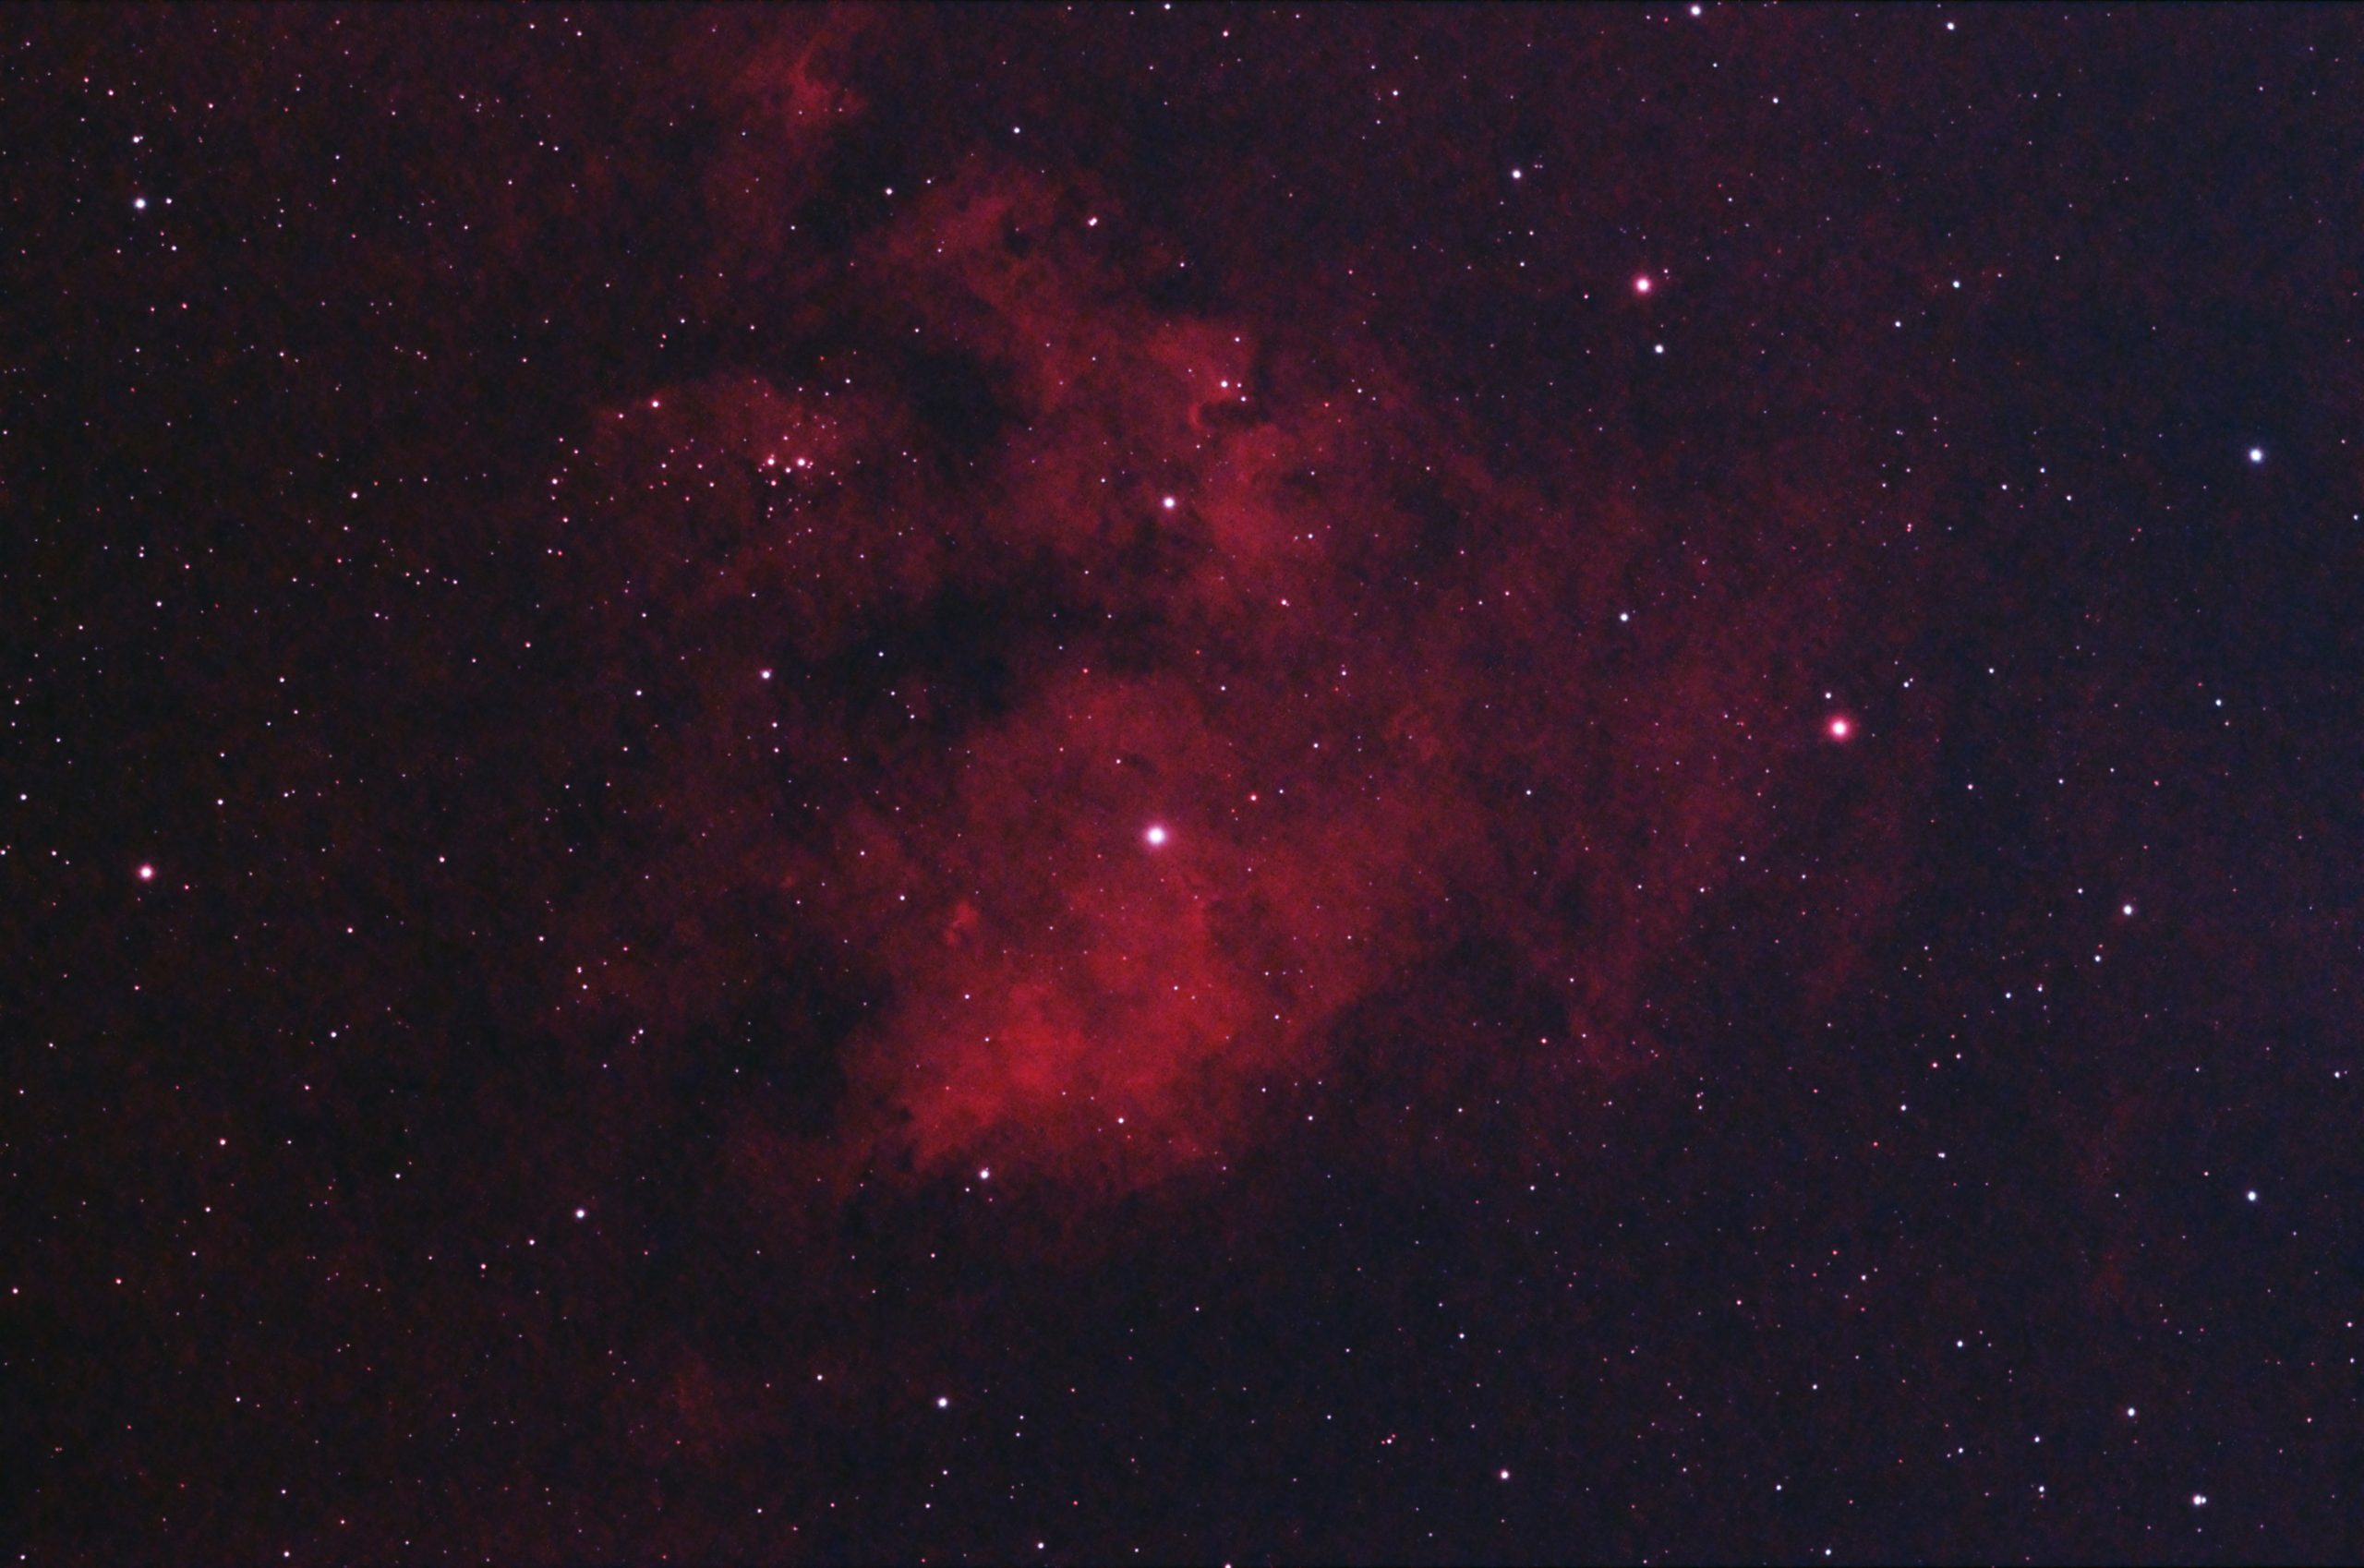
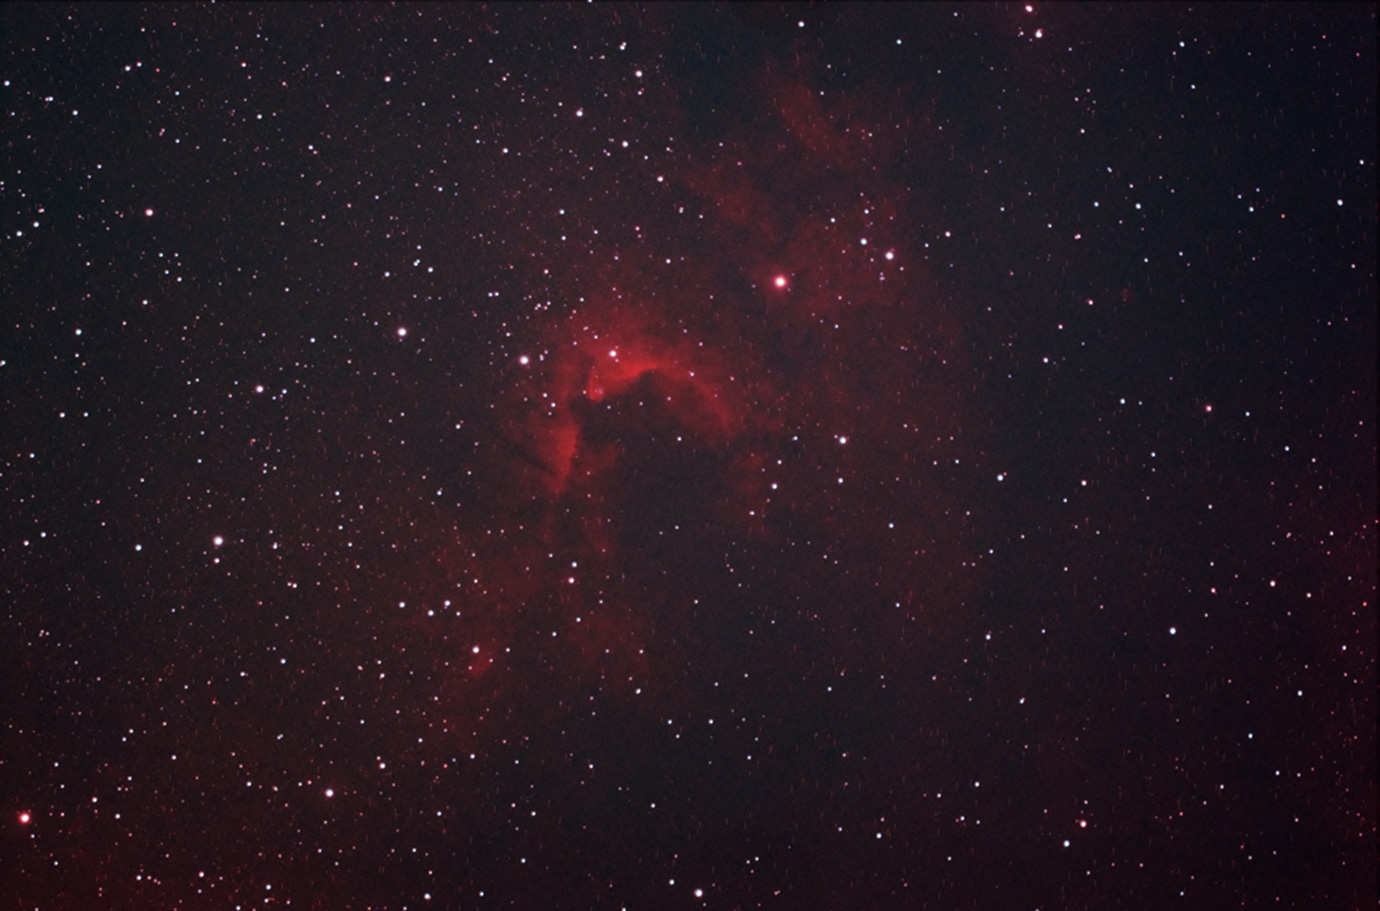
The Cave Nebula – – 242 x 30 sec @ Gain 42, Offset 42, -20C, 26×240 sec @ Gain 20, Offset 31,-15C, QHY183c, L-eNhance filter, Televue TV-85 at F/5.6Moon Composite – Dec 2, 2019Monkey Head Nebula – 100 x 30 sec @ Gain 42, Offset 42, -20C, QHY183c, L-eNhance filter, Televue TV-85 at F/5.6
Sunday evening was beautiful here in Cajun Country and I did not let the night go to waste. I shot a number of things, but I went back to the Cave Nebula early on to add more data to my existing image of it.
I shot the moon next, even though the seeing was not that great. I shot 10 stills starting out slightly underexposed and progressing to over-exposed to show the dark part that was lit by Earthshine. My experiment to blend them all together was not what I had in mind in terms of look and feel. Plus, I had shot them in 8-bit mode instead of 16-bit mode in SharpCap 3.2. It was a learning experience, I guess. I’ll figure it out one day, hopefully.
I did the Monkey Head Nebula last and it hardly needed any post-processing. 50 minutes worth of data was enough to show most of it. Guiding and composition were good and the image was easy to post process. I packed it in after this, since it was nearly 2:00 am and I needed at least a few hours of sleep before work Monday morning. lol
Like before, these images were all taken from a metro area with Bortle 8 red zone light pollution levels. An Optolong L-eNhance filter was used to shoot through the muck.
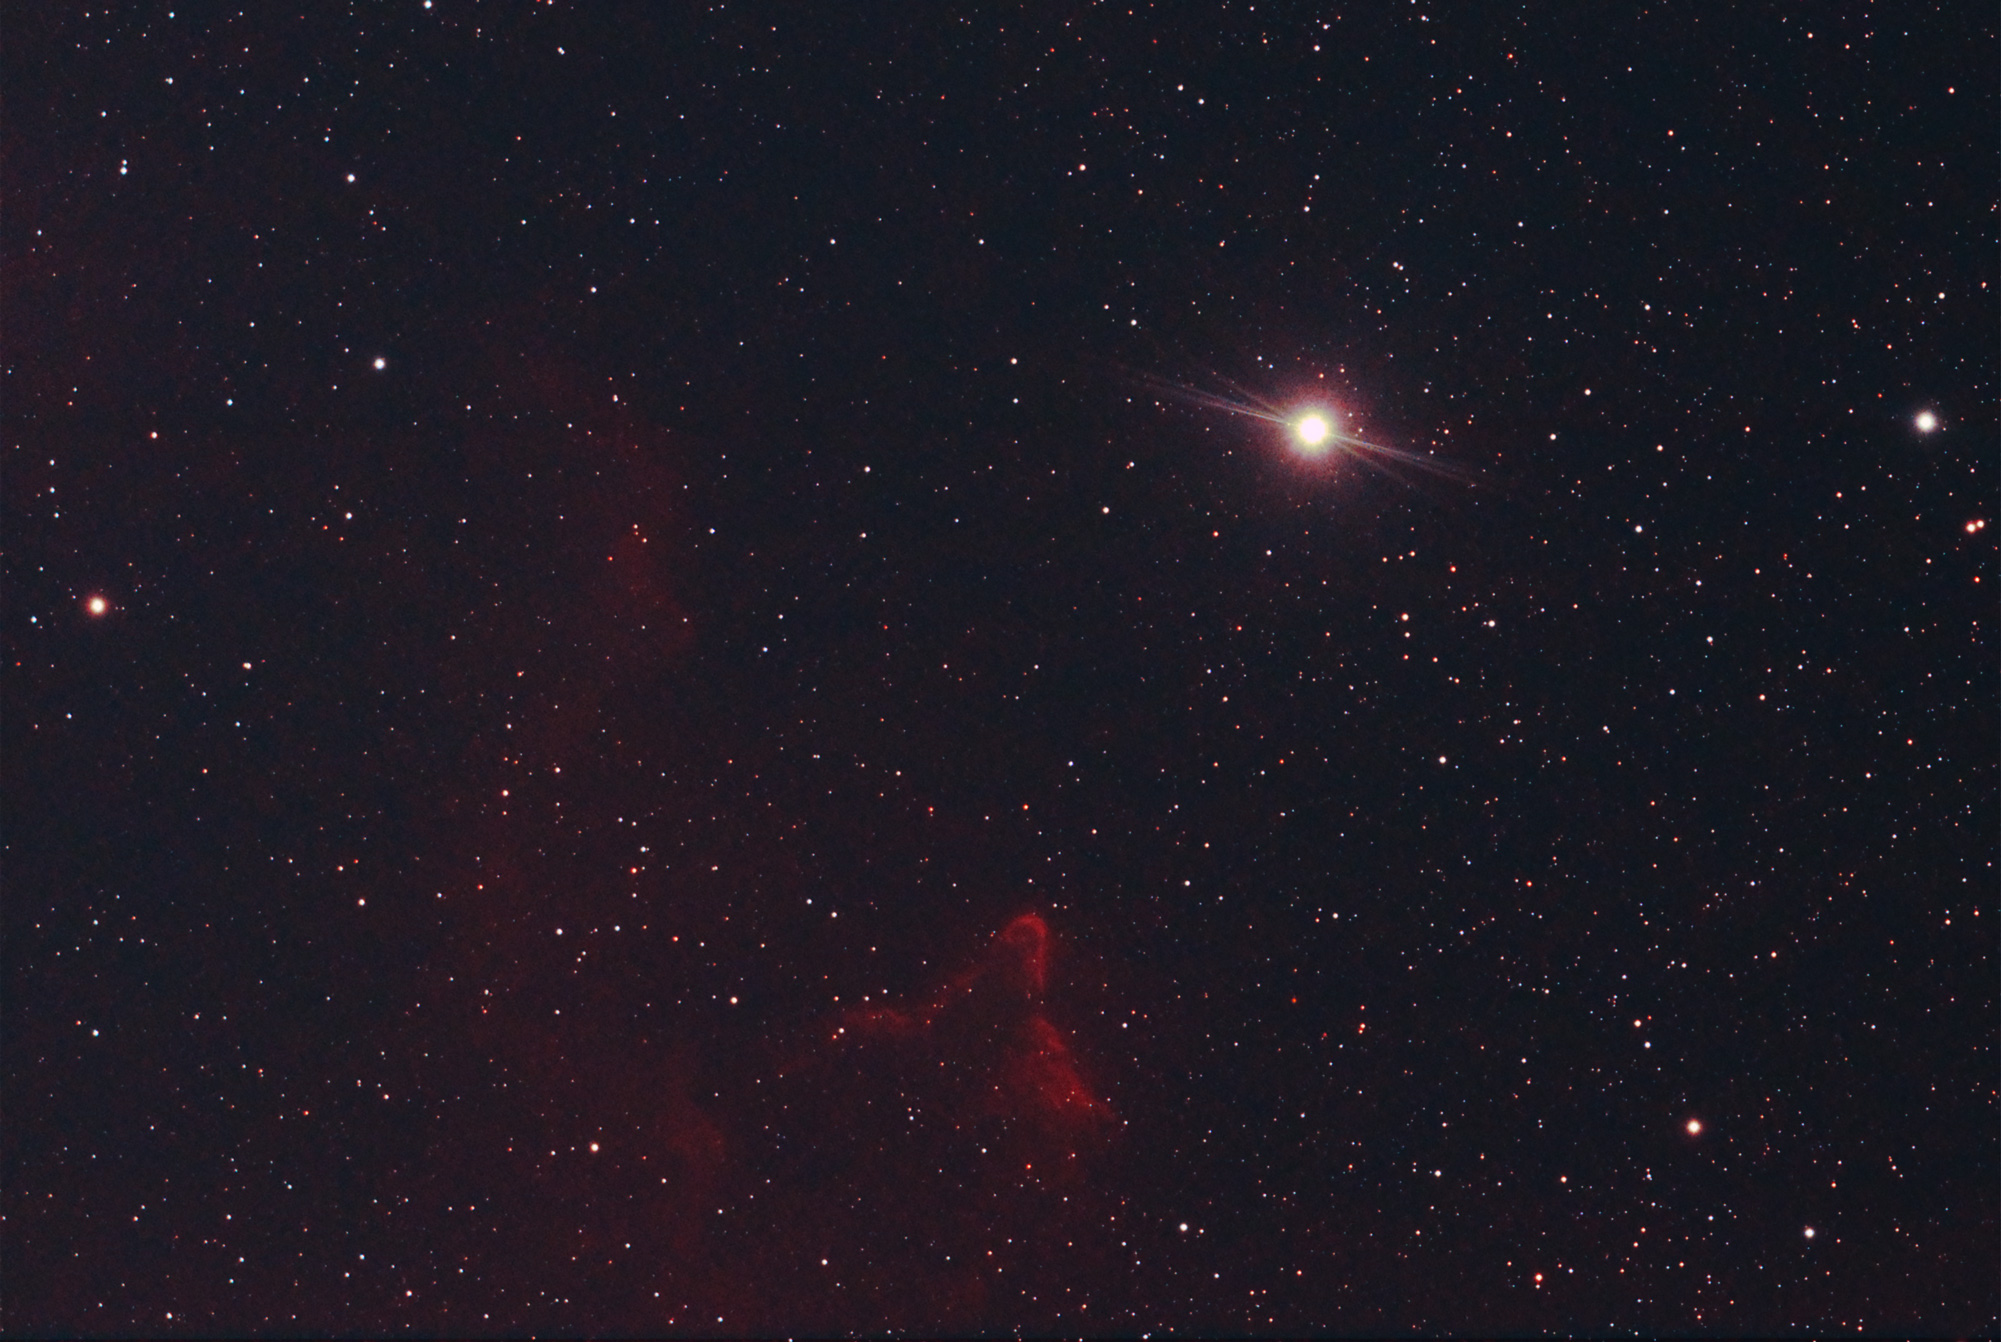
IC410, aka, Tadpoles Nebula, QHY183c (-20C,) 100×30 sec @ 30 gain, 31 offset, Optolong L-eNhance Filter, Televue TV-85 at F/5.6.
This is data from the same dates as images in the three previous posts before this one. There were so many things I wanted to shoot in these sessions that were Ha, but needed 3 or 4 times more exposure to do them justice. I scouted for what would be brighter Ha targets and did some test stacks trying to get the feel of how much certain things would need.
This one was one of the bigger and brighter targets I tested, but I could tell the less than an hour’s worth of data would need lots of work to make it into a presentable image. Another one of those works in progress, I guess. I gave it nearly an hour but it really needed at least double that as a start and 4x that for something exceptional.
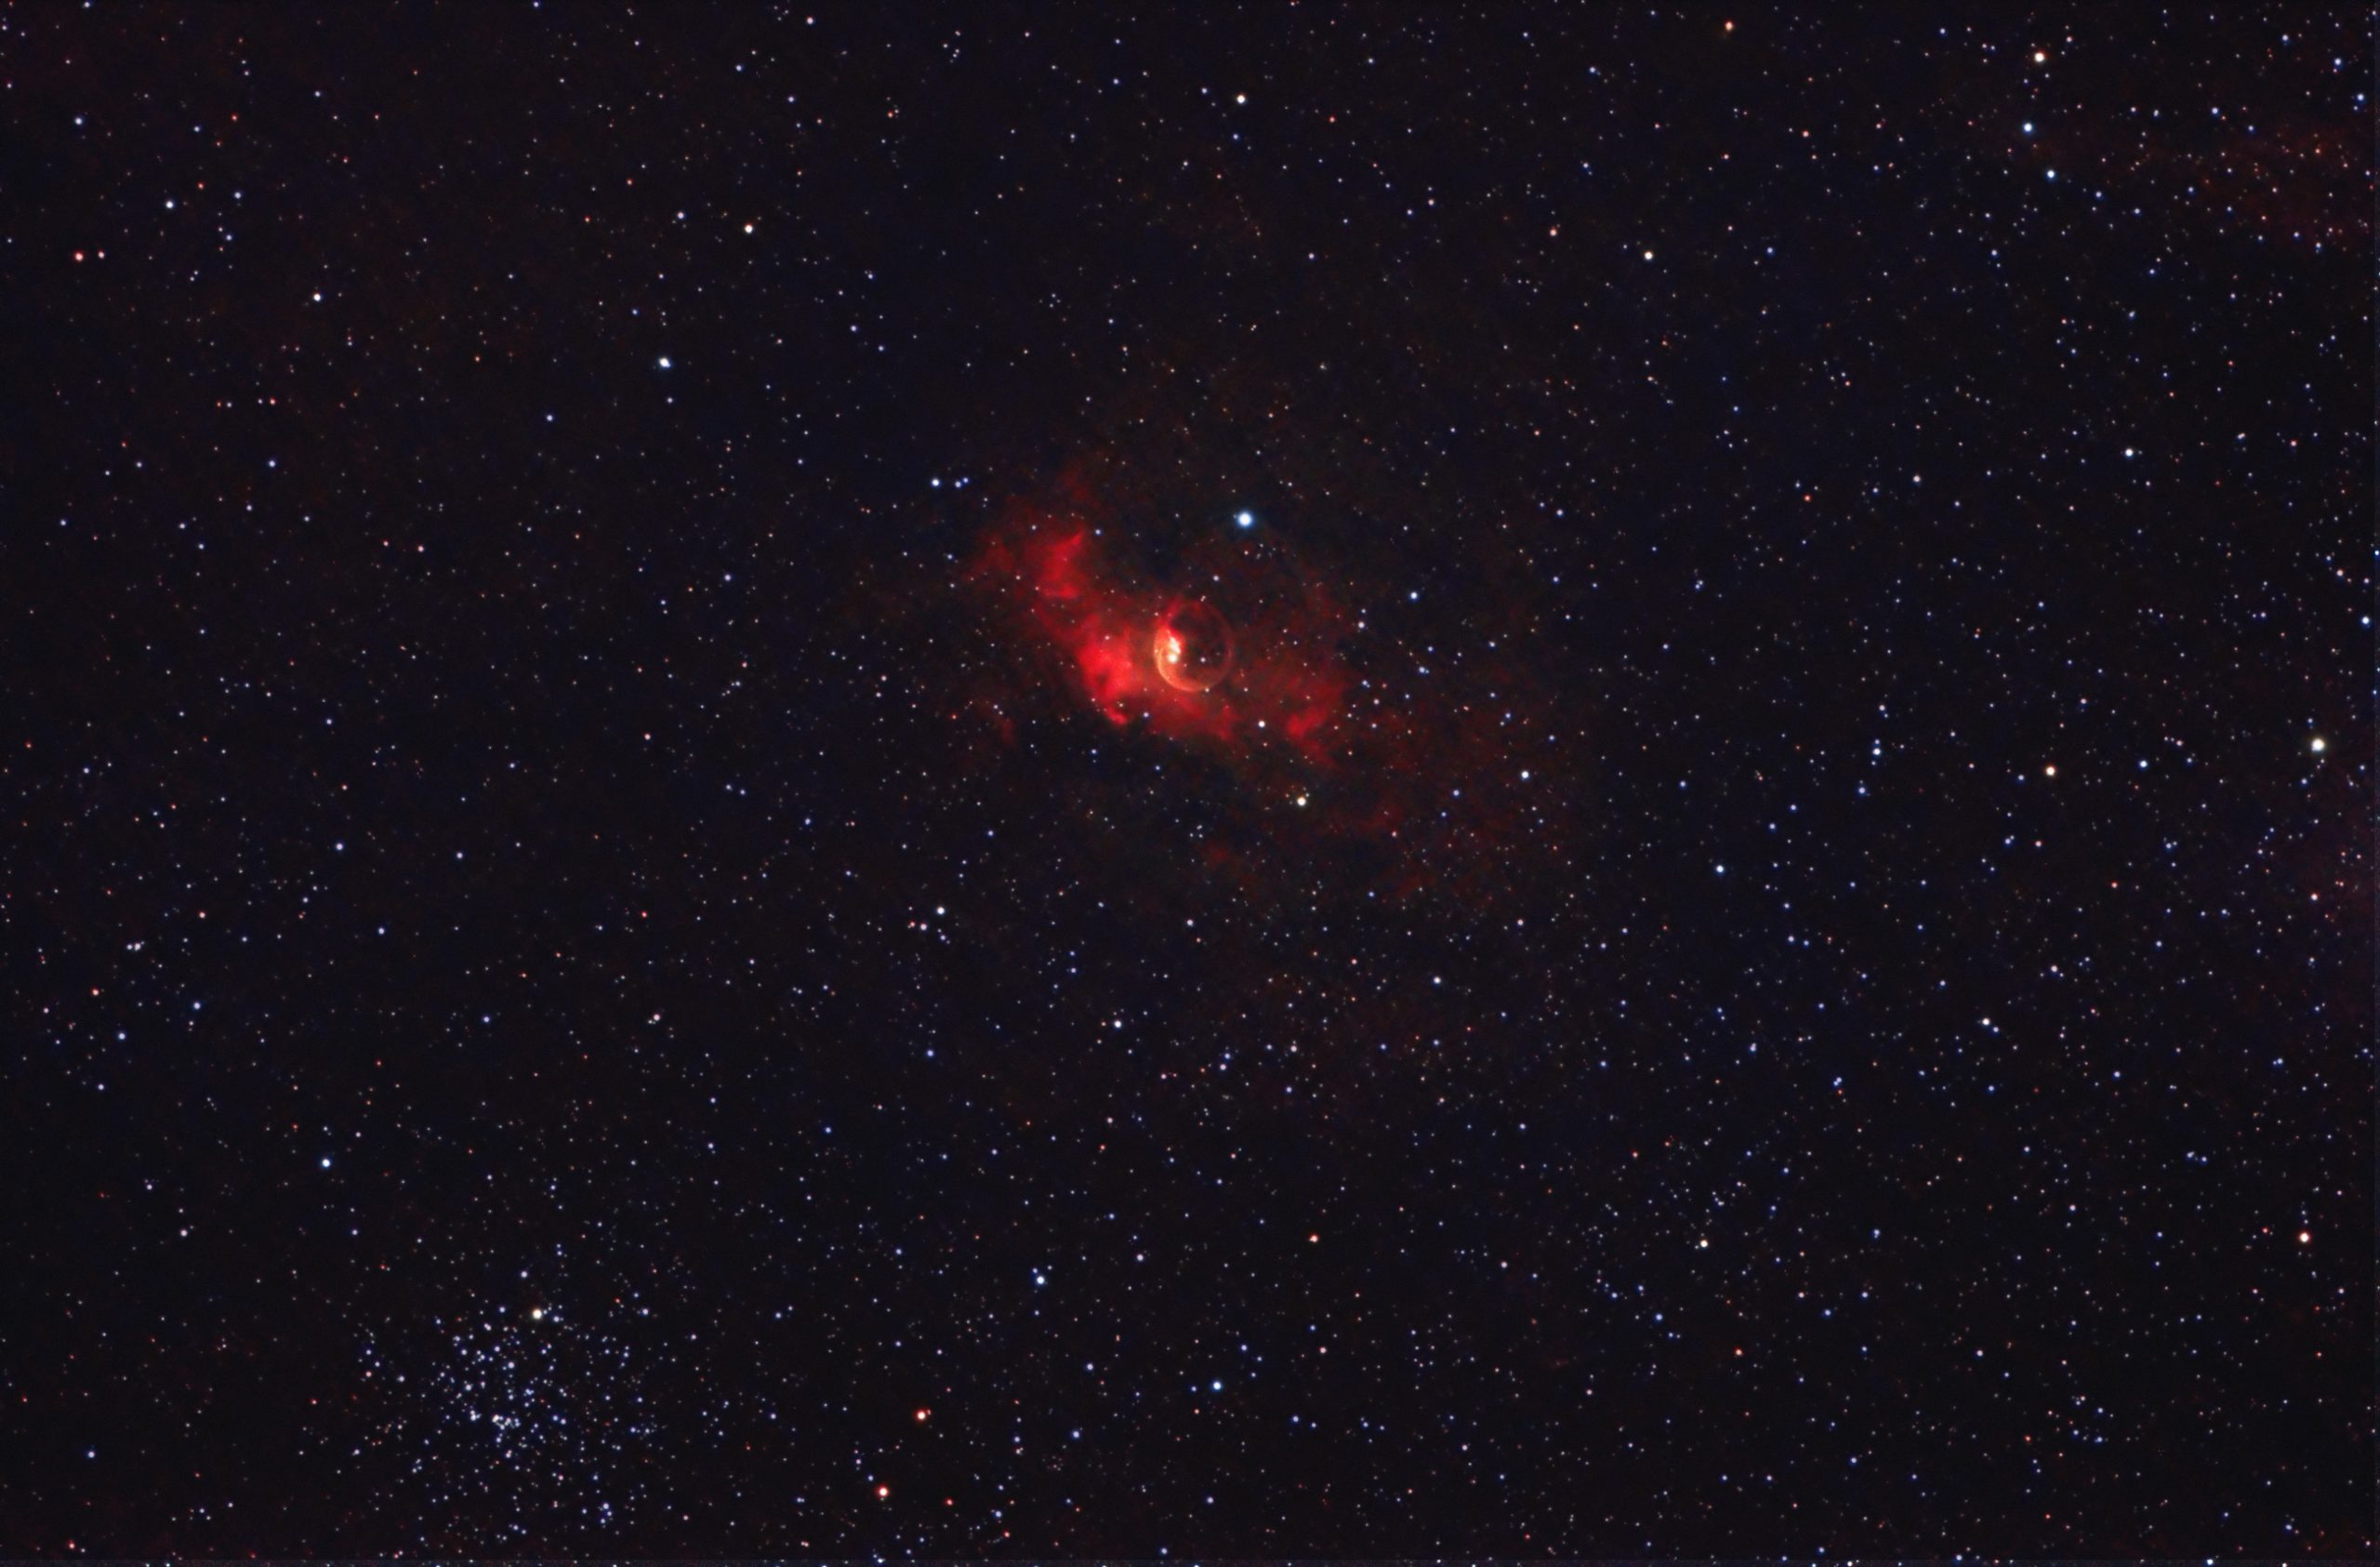
The Bubble Nebula. 120×30 and another 1800 sec mixed exposures. QHY183c, L-eNhance Filter, TV-85 at F/5.6.
A mixture of 120×30 sec exposures taken with a L-eNhance filter and a mixture of 15, 30 and 1 minute exposures taken with a UHC filter. About an hour and 30 minutes total. The 120×30 set was at 30 gain and -20C.
I am starting to like the 30 gain setting, since it gives the best results with shorter exposures. Over 40 is too much noise and under 30 it is just too slow.
When the set began there was no matching dark to subtract, so I was using one at gain 20. I stopped after about 10 shots and took some darks and then restarted shooting. I’m glad I did since the amp glow was starting to show up bad on the right side of the frame. The new darks overcame it and the glow averaged out after a while of LiveStacking with ShapCap 3.2.
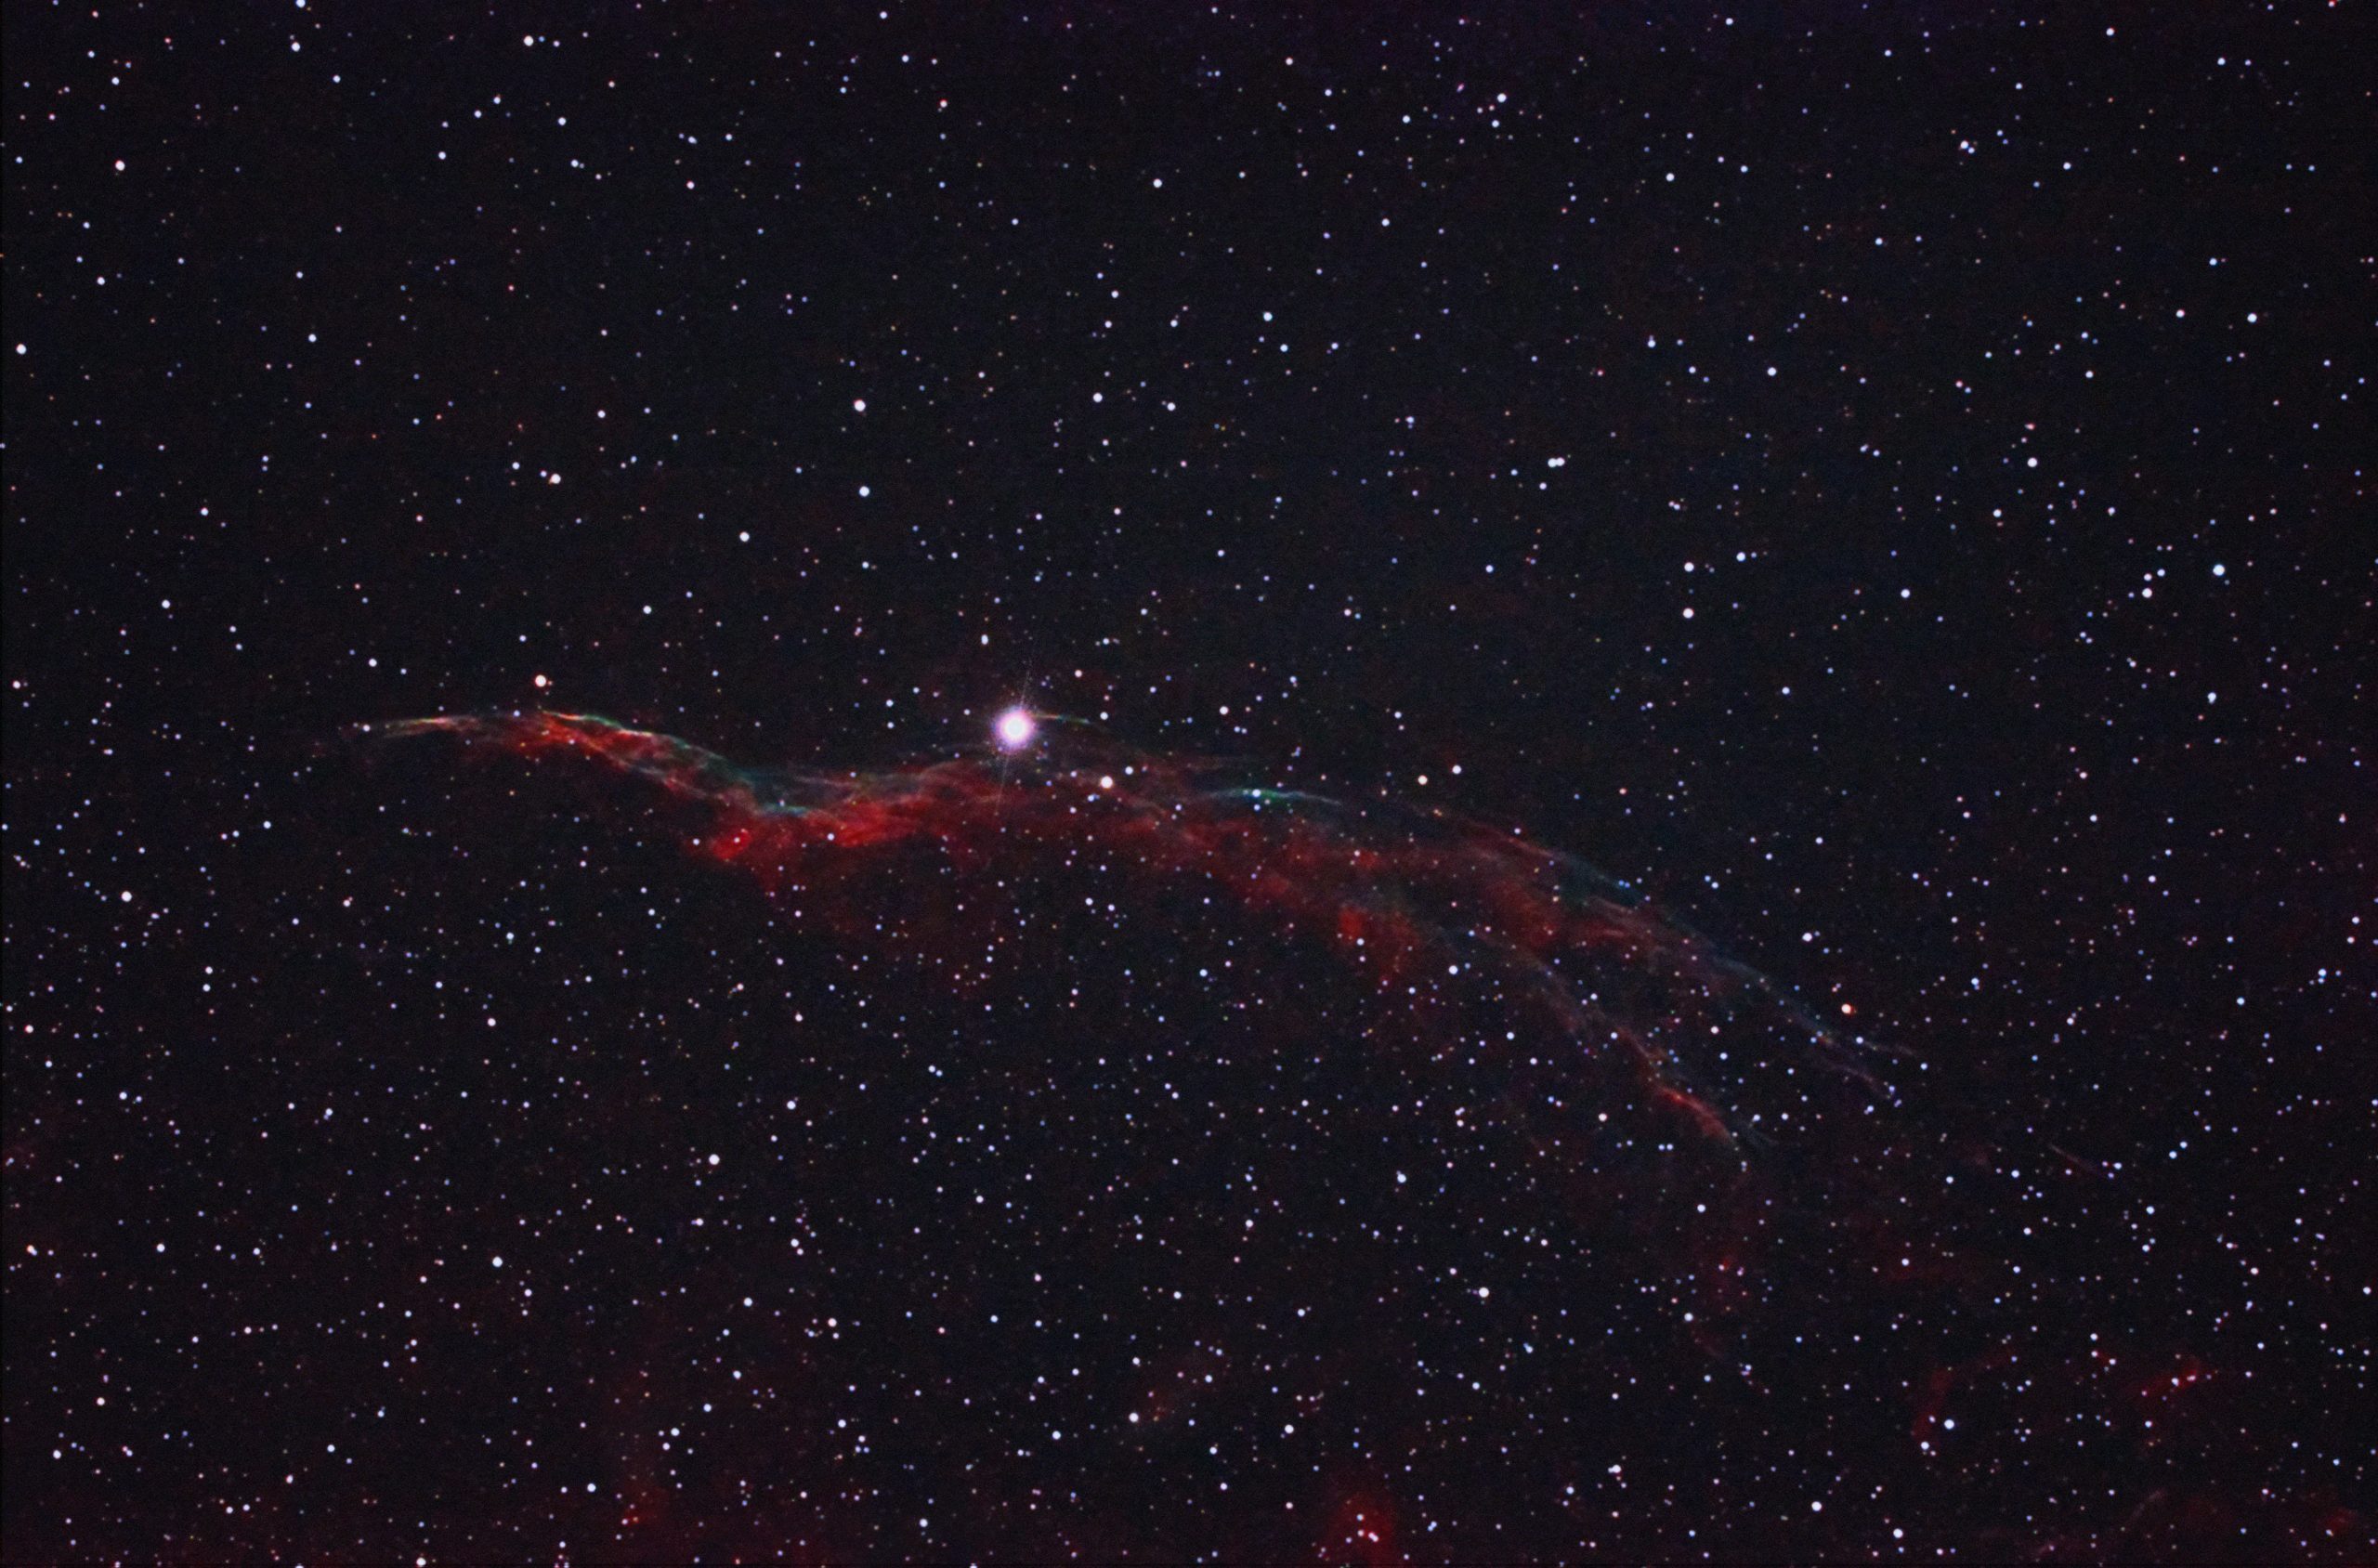
West Veil Nebula. 46×30 sec, QHY183c @ -15C, Gain 42, Offset 100, L-eNhance filter, Televue TV-85 at F/5.6.The Cave Nebula. 26×240 sec, QHY183c @ -15C,, Gain 20, Offset 31, L-eNhance Filter, Televue TV-85 at F/5.6.
What luck! First light for new filter is the day I received it! Thanks to the clouds for staying away. What I wanted to test was my new Optolong L-eNhance dual-band nebula filter, which is similar to the UHC filter I already own but with a narrower bandwidth and a more even color rendition across the frame than the cheap UHC one I’ve been using. I got to try it out before the run of good weather we’ve been having ended.
I was a able to test it on the Veil, which I recently imaged, and the Cave Nebula, which I had never shot before. I am very pleased with the results. Even color and illumination and better rejection of LP.
The Veil nebula was shot like I’ve been doing – 30 sec sub images at high gain. The Cave was long exposures of 4 minutes and I managed to get 26 subs. The Veil is a finished image and the Cave Nebula is still a work in progress. It seems the long exposure, 4 minute darks I used were not too good of a match and there are numerous hot pixel trails left to manually repair or clone out still left to do.
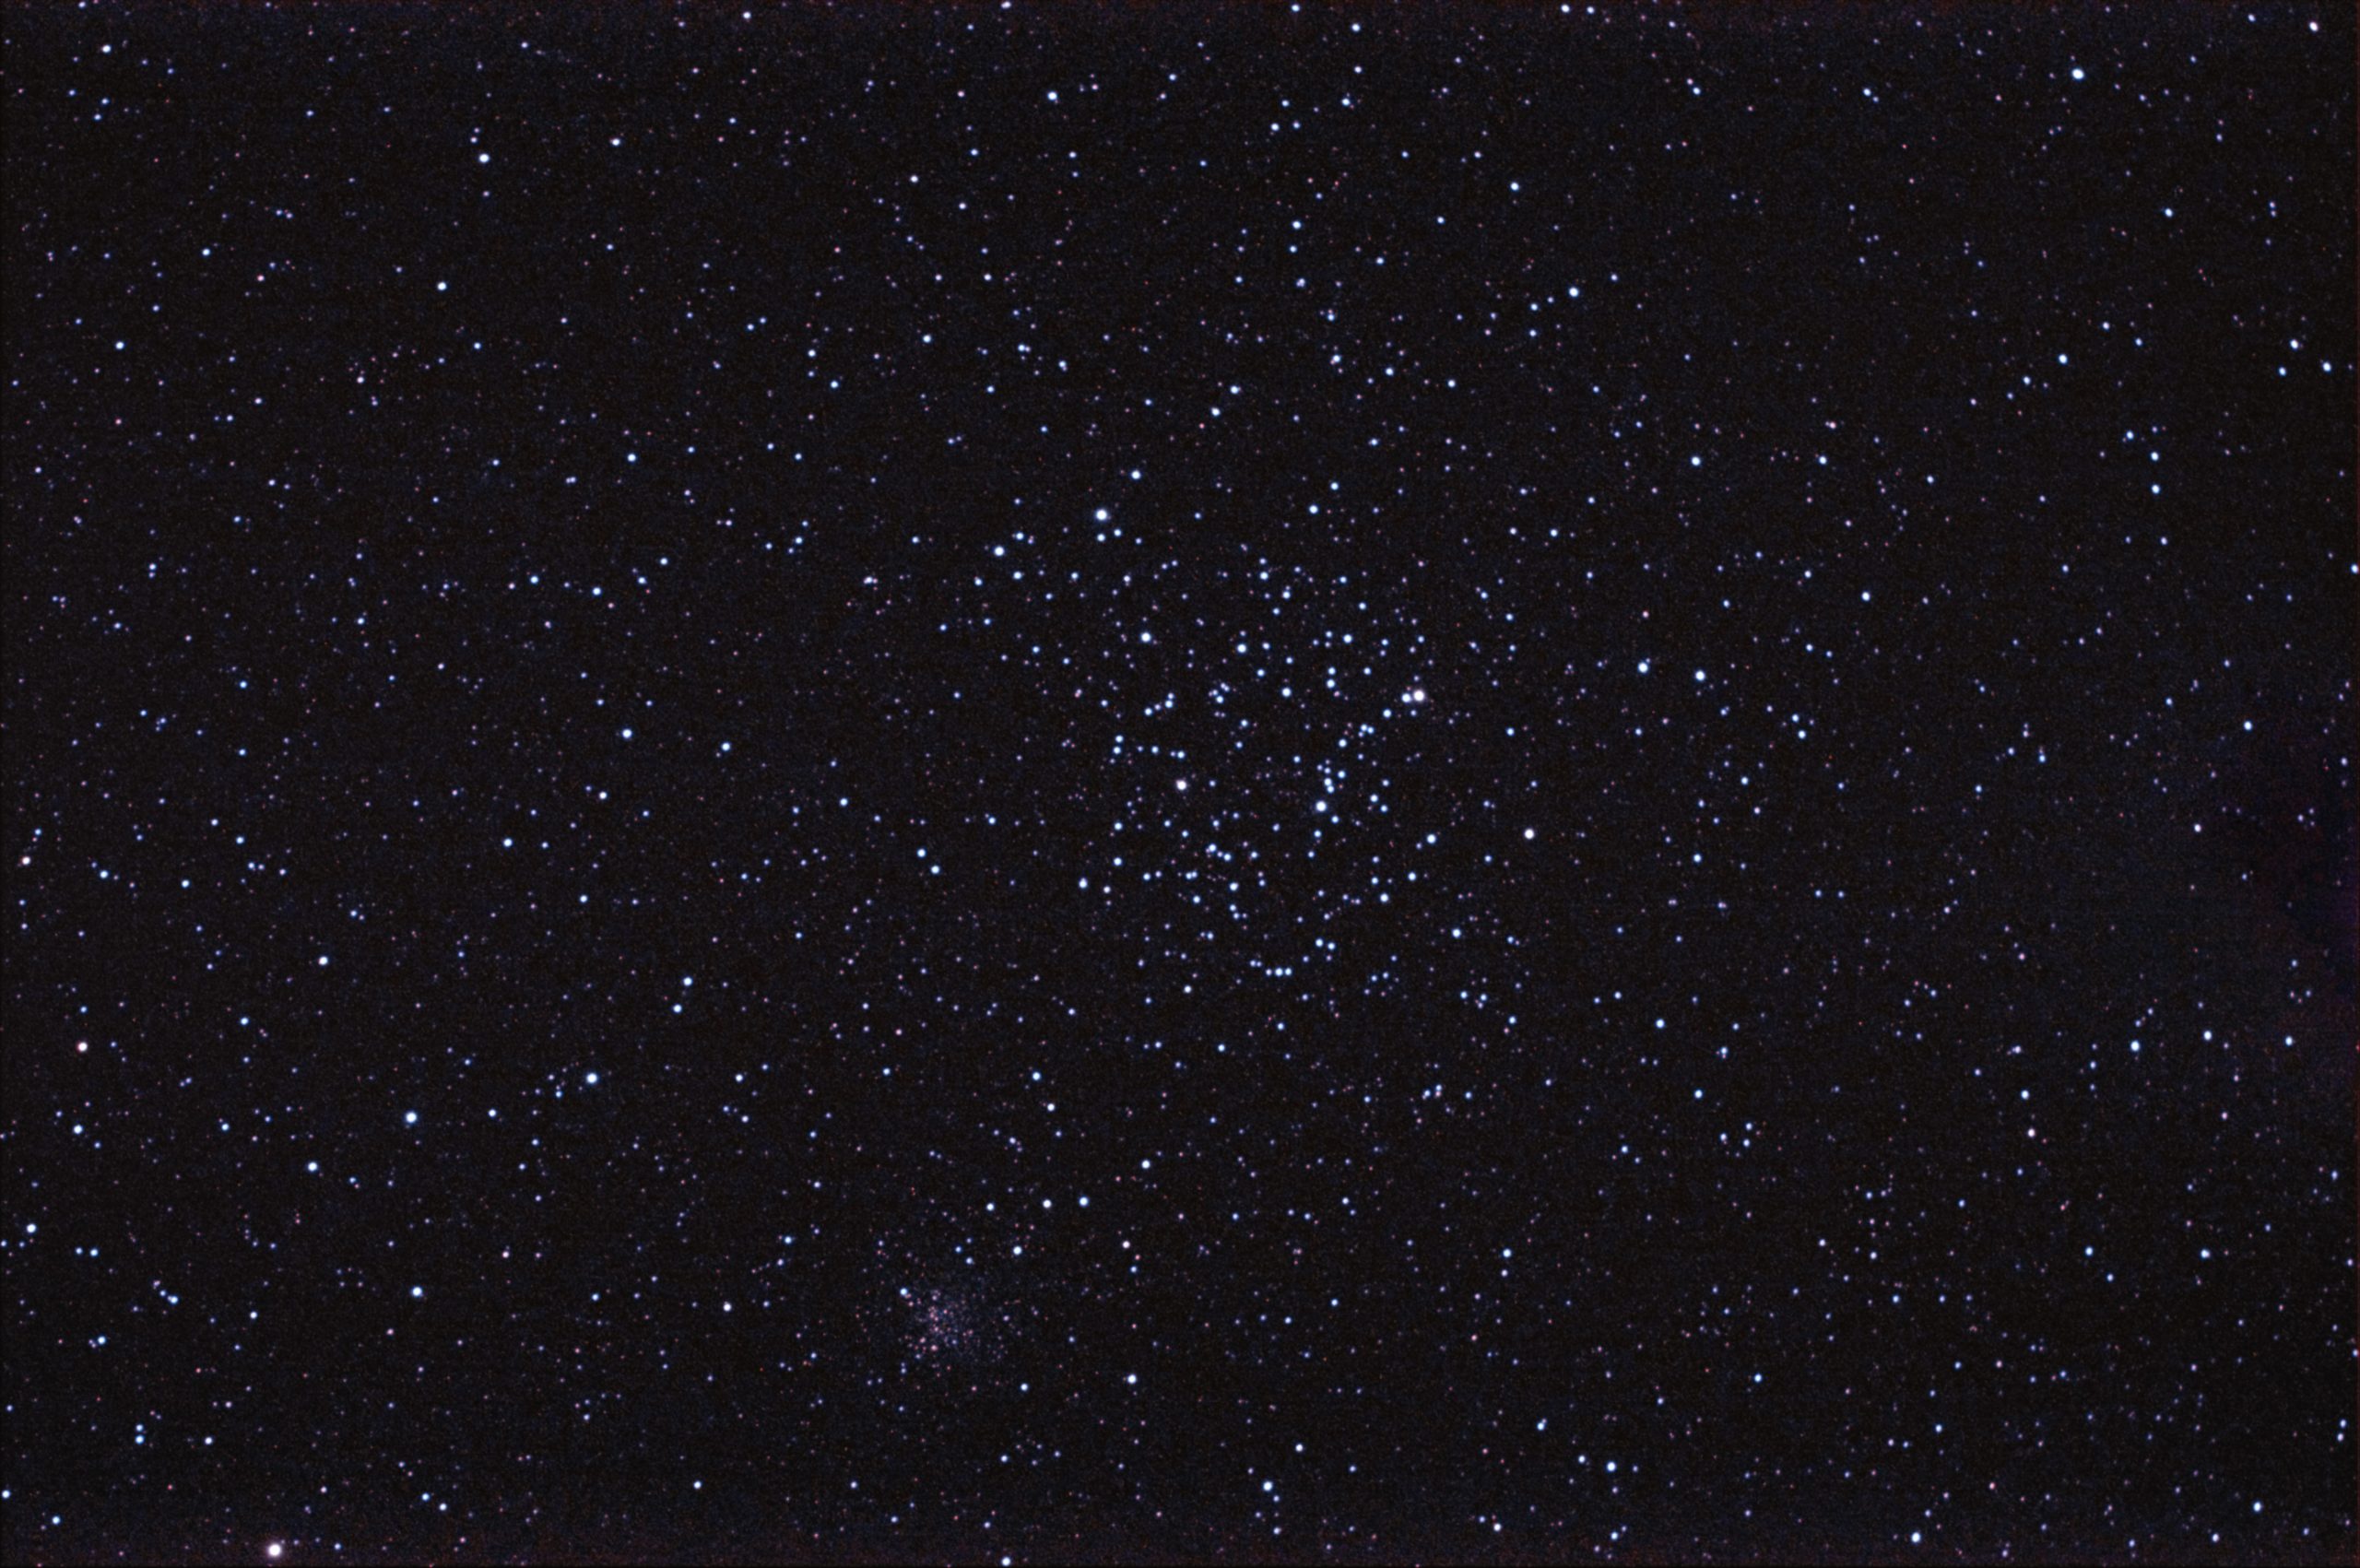
I also tried it on two reflection nebulae, one being the Running Man in the image below, and it was not as good as my UHC filter. I also tried one star cluster, M35, and it is the last image below. No galaxies yet, so I’m not sure how well it will work for those. Maybe next time I will have to try for one and find out.
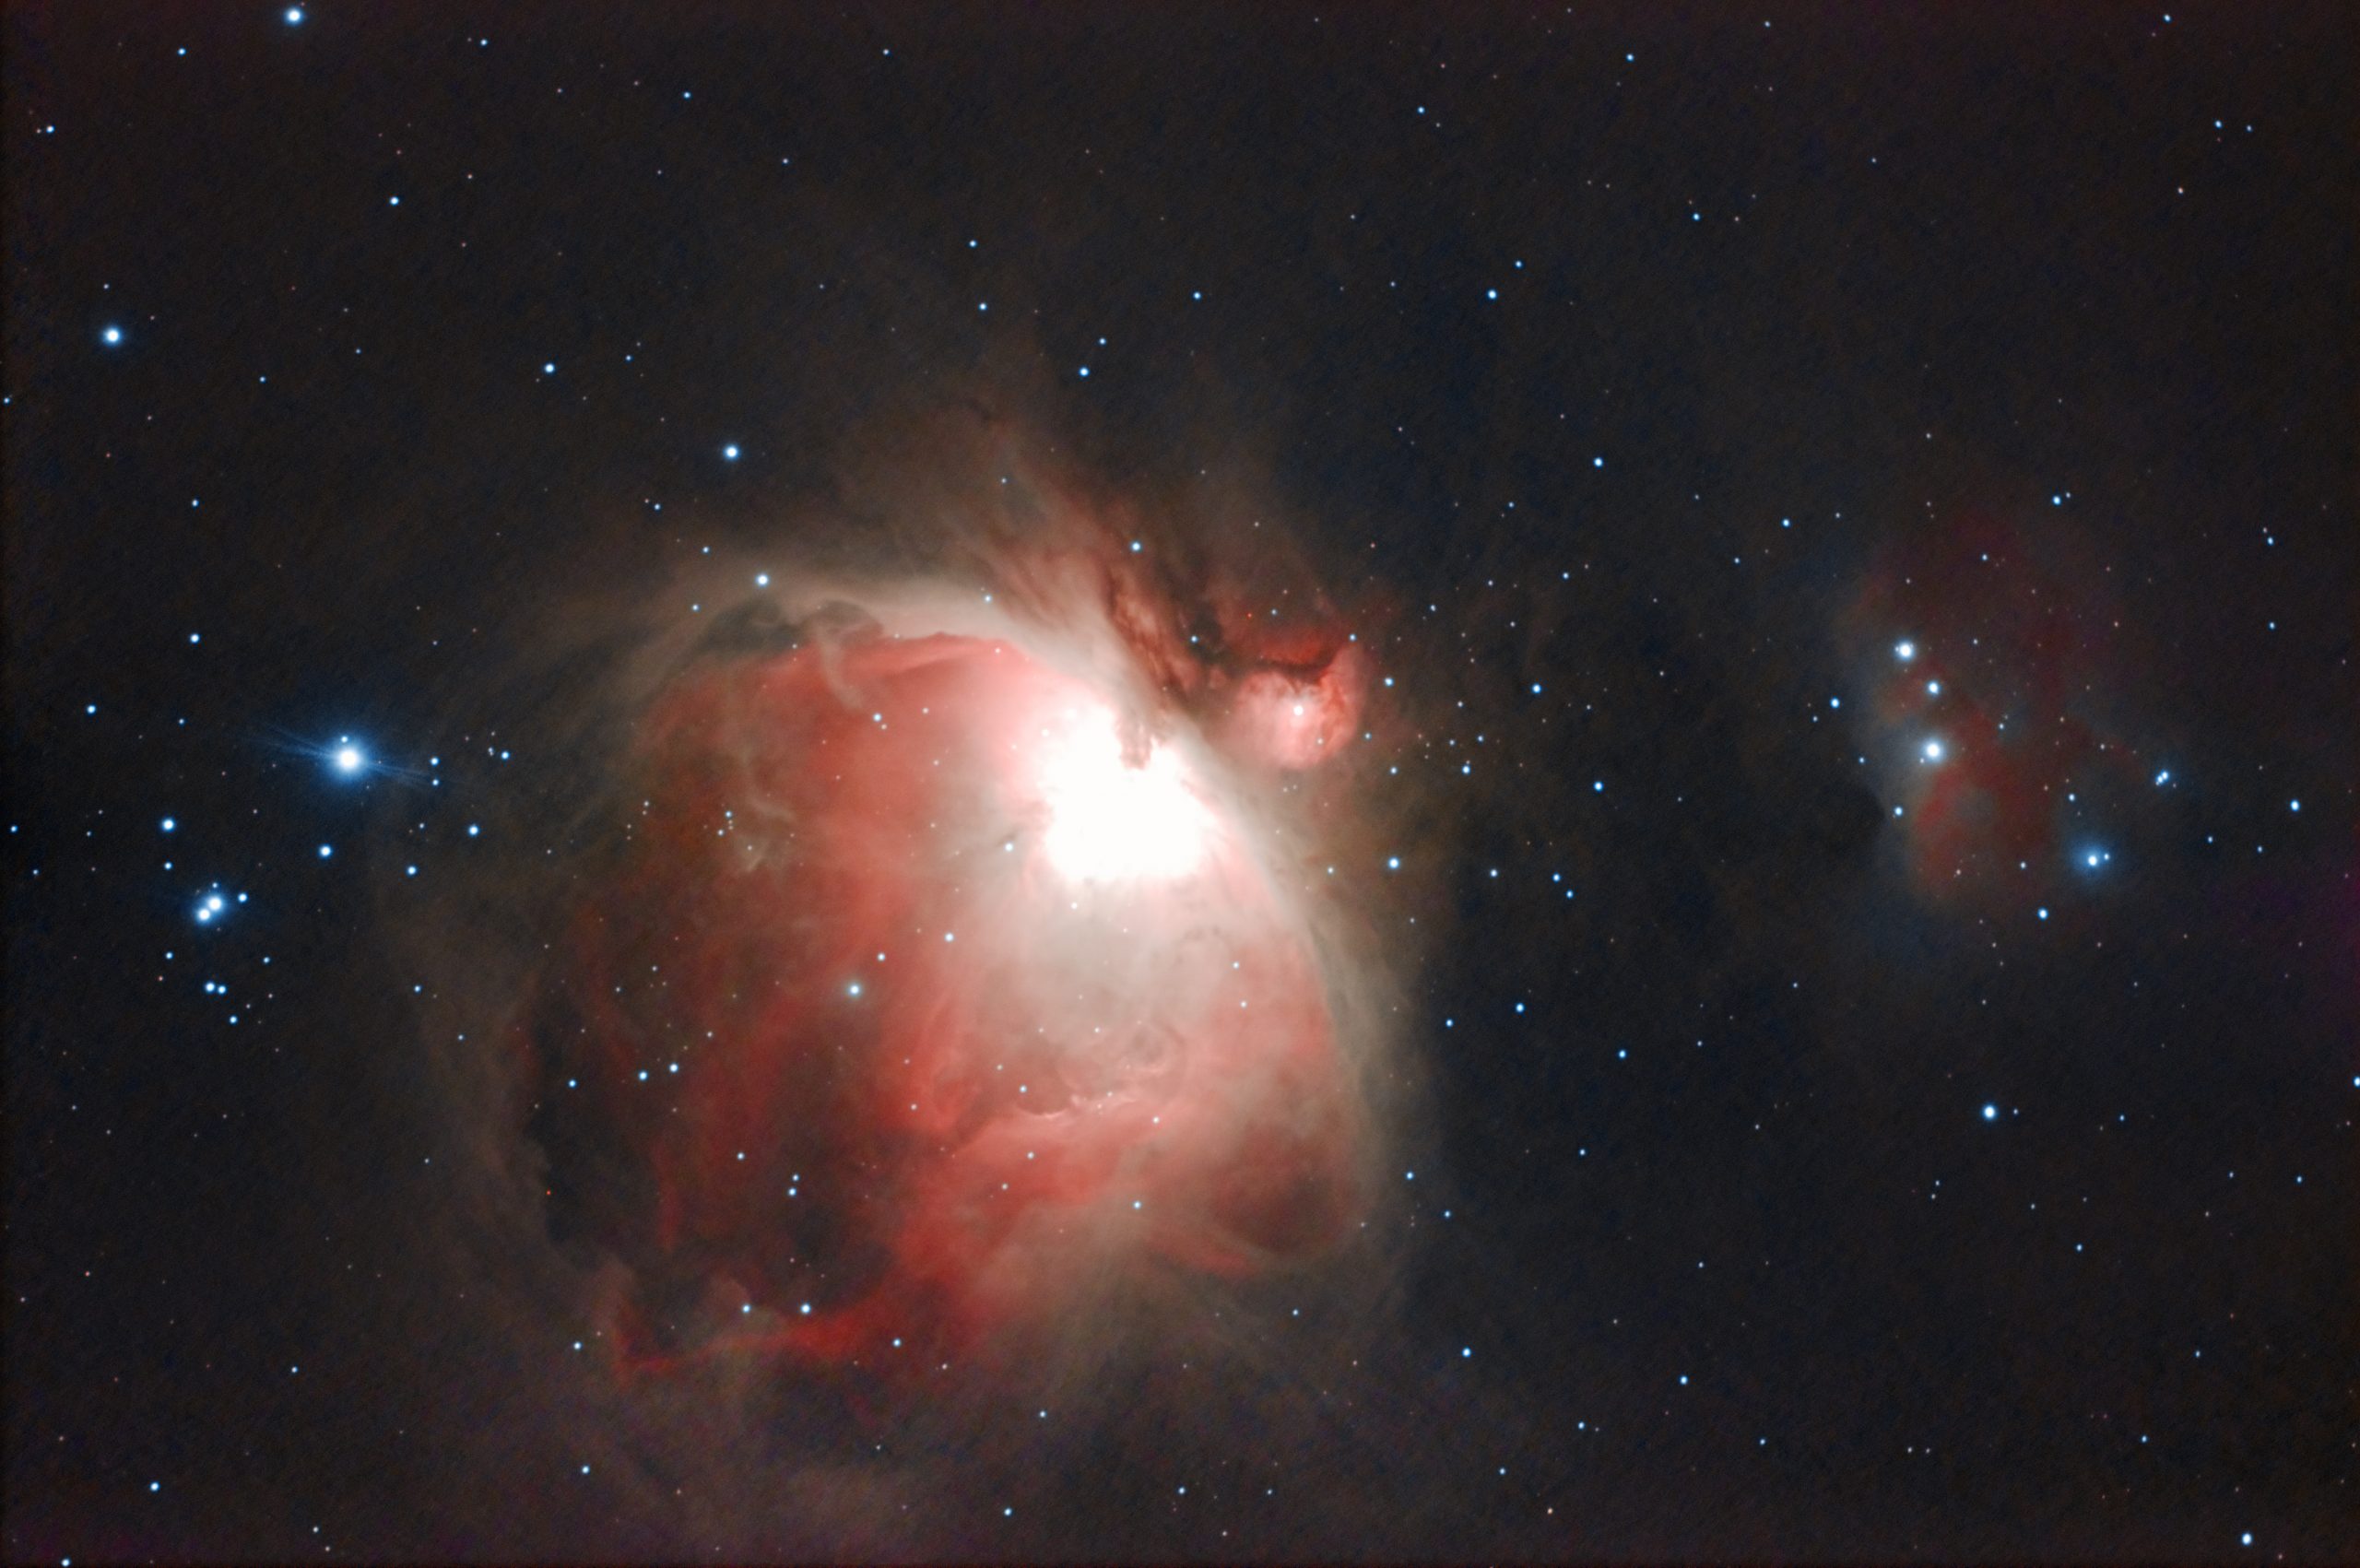
M42 – 114×30 sec, QHY183c @ -15C, Gain 42, Offset 42, L-eNhance filter, Televue TV-85 at F/5.6.M35 – 20×30 sec, QHY183c @ -15C, Gain 42, Offset 42, L-eNhance filter, Televue TV-85 at F/5.6.
Images of Comets, Nebulae, Galaxies and Star Clusters